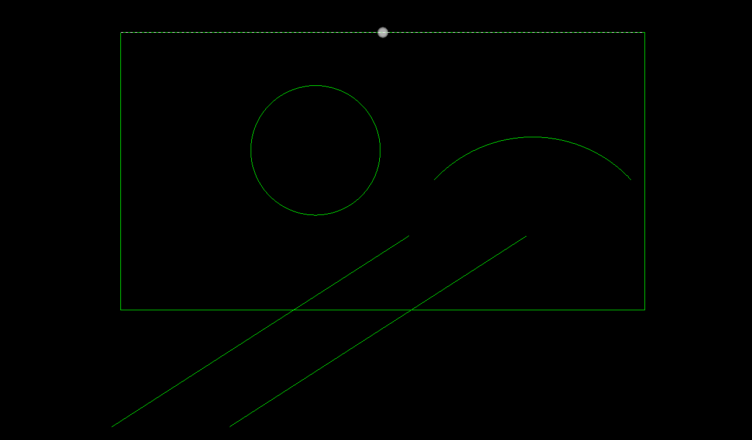
Alphacam Snaps – Alphacam Tutorial for Beginners
Snaps – something definitely useful!
When you create a geometry or eg. use some function from Edit Tab on the command line Snaps appears.

You can also find Snaps in the Geometry Tab.
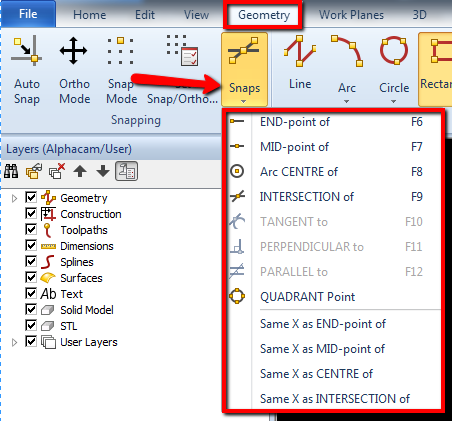
First Snap on command line is Auto-Snaps. I will discuss this later.
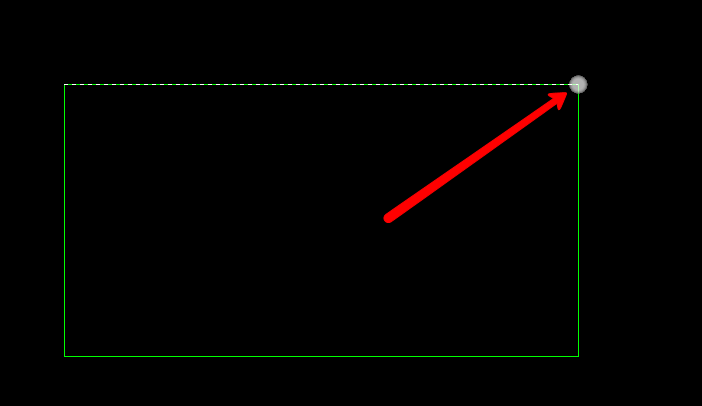
Let’s see END-point of Snap.
![]()
This snap allows you to indicate the end of an existing geometry.
![]()
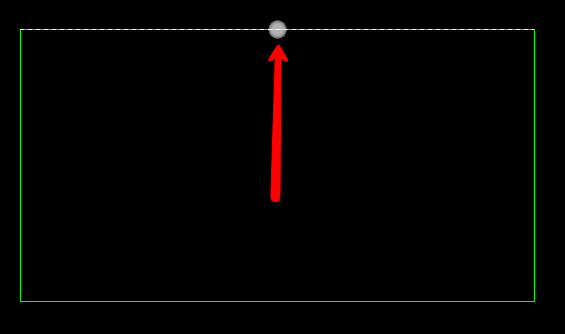
Now you are sure that you point the end of geometry.
Watch the video on YouTube – End Snap
Next Snap is MID-point of
![]()
This Snap allows you to indicate the middle of an existing geometry.
Watch the video on YouTube – Mid Point Snap
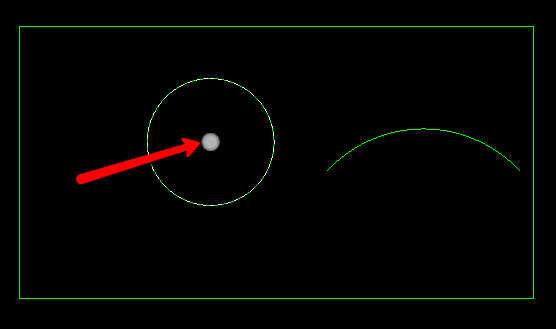
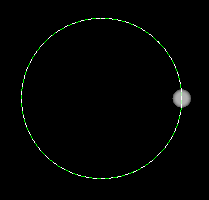
Next Snap is Arc CENTRE of.
![]()
This Snap allows you to indicate the center of an arc or circle.
Watch the video on YouTube – Arc Center Of Snap
Next Snap is INTERSECTION of
![]()
This Snap allows you to indicate the intersecting point of two geometries.
You have to select two geometries.
![]()
![]()
And you will get the intersecting point of this two geometries.
Watch the video on YouTube – Intersection Of Snap
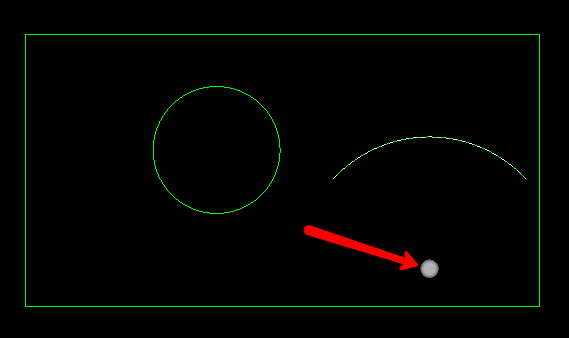
Next Snap is TANGENT to.
![]()
This command allows you to select a point that is tangential to a selected Arc.
We can use this only for lines.
After we selecting this command we will be prompted to select an arc geometry.

Once we have selected the Arc that we would like to use, Alphacam will connect the Line to the Arc so that it is tangential to the select Arc. This means that there is no definite starting point for your line until the second point has been selected as the line’s starting point will move to make sure that the line remains tangential.

Watch the video on YouTube – Tangent To Snap
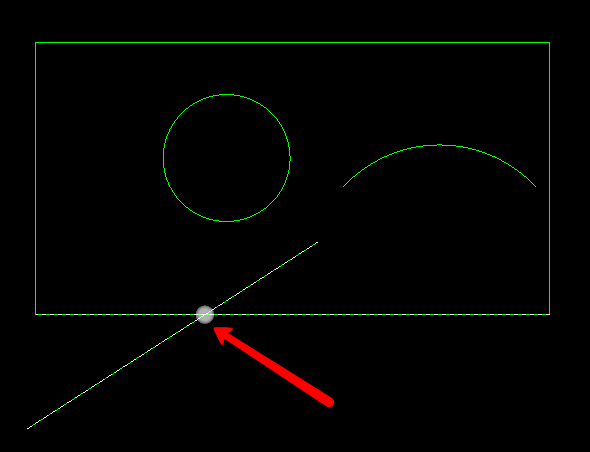
Next Snap is PERPENDICULAR to
![]()
This snap allows to draw a line that forms 90 degree angle with an existing element. We can use it only for lines.
When using this command to draw a line that is perpendicular to an arc, the line that is drawn will connect to the outside perimeter of the arc from +90˚ or less than 90, then line will be drawn along the inside of the arc’s perimeter.
When using this command to draw a line that is perpendicular to a circle, the circle is treated as two arcs.
After selecting this snap, select the element in the drawing that you wish to use as the perpendicular element.
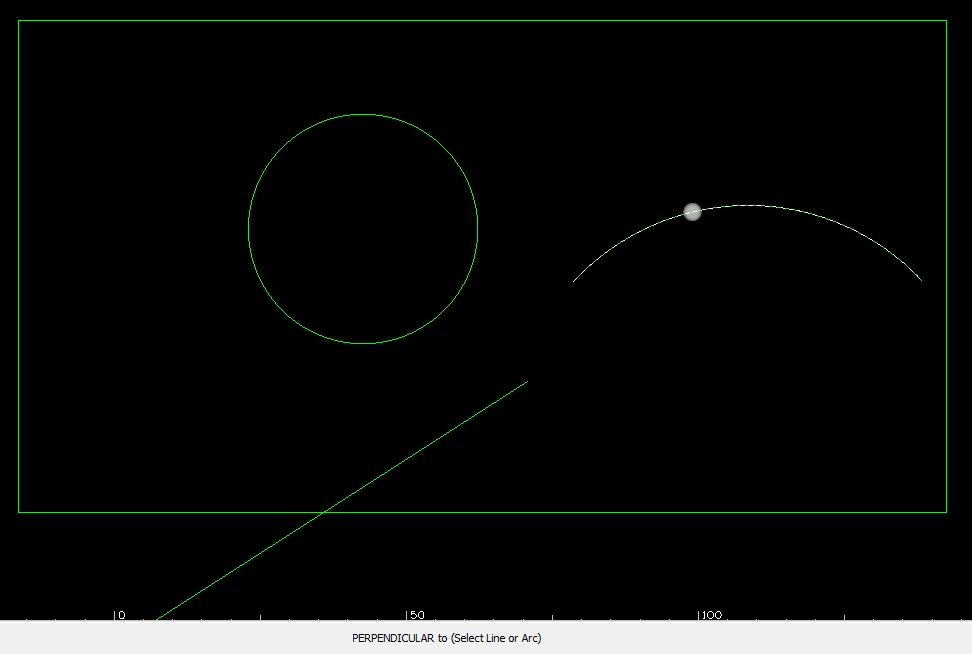
When we have selected the perpendicular element, Alphacam will connect the line to the element and move it along the element so that when you select the second point of the line, the line segment that is created is at 90 degree angle to the element.

Watch the wideo on YouTube – Perpendicular To Snap
Next snap is PARALLEL to
![]()
This snap allows to draw a line that is parallel to an existing element in the Alphacam workspace and we can use this snap only for lines.
This snap will only become active, once we have created a starting point for line.
After we have selected the starting point of line, we can select the element that we would like this line to be parallel to.
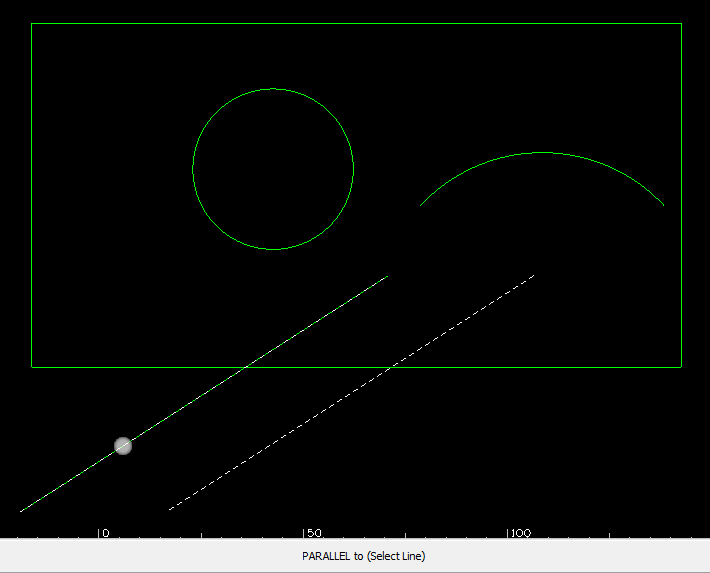
After we have selected parallel element, we can either use mouse pointer to select the point that we would like to use as second point or we can enter the coordinates into numeric entry.

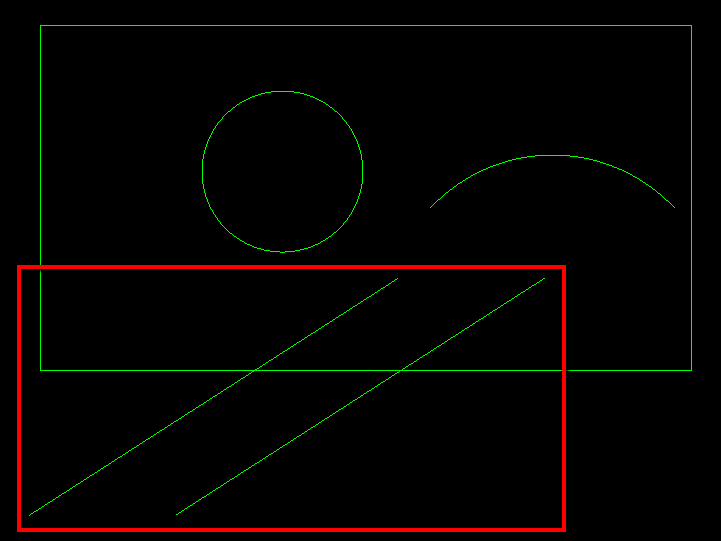
And we will get two parallel lines:
Watch the video on YouTube – Parallel To Snap
Next snap is QUADRANT Point.
![]()
This snap allows to select the nearest quadrant point of a selected arc or circle.
The quadrant points of a circle exist at the following locations on an arc:
1) 0º (360º)
2) 90º (-270º)
3) 180º (-180º)
4) 270º (-90º)
After selecting this snap, we will be prompted to select arc or circle. When we click on the arc or circle, Alphacam will snap the point to the quadrant point that lies closest to the point of the arc or circle that we selected.


Watch the video on YouTube – Quadrant Point Snap
We have also Auto Snap option. To activate Auto Snap click the Auto Snap icon or F2 key on keyboard.

![]()
We can activate this snaps and we don’t need to choose the snap every time. We can use Auto Snap if we want to select end of element, middle of element, center of element or quadrant point. This option is active until in turned off by F2 key or clicking Auto Snap icon in the Alphacam command line.
Watch the video on YouTube – Auto Snap
If you find my tutorials helpful, you can support CADCAMLessons:
https://ko-fi.com/cadcamlessons