
Heidenhain Pocketing – CYCLE 251
YouTube: https://youtu.be/5YOdqQusoTk
Pocket machining in Heidenhain – Cycle 251 – Rectangular Pocket
In this lesson we will discuss cycle 251 in Heidenhain. This cycle allows us to machine the pocket in an easy way.
First, we let’s add tool retract and tool preposition.
Highlight the line 19 (after this line we will add tool retract).
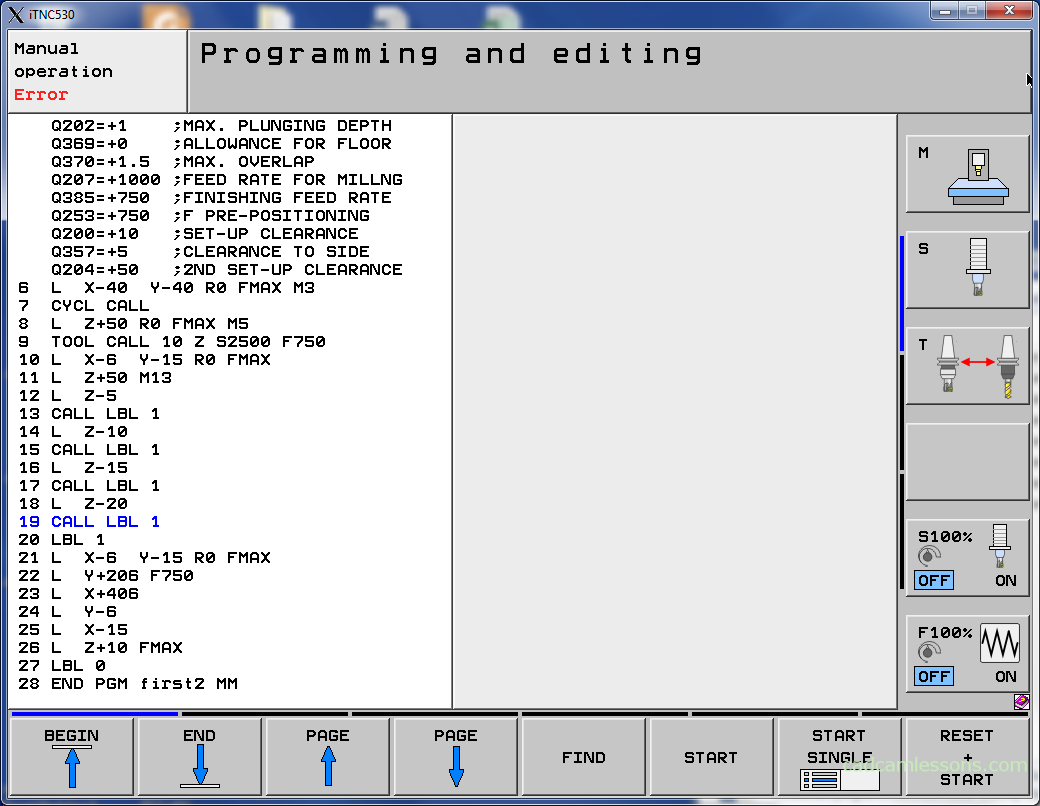
Next, select L(ine) button and enter Z+50 R0 FMAX M5, and press END button.
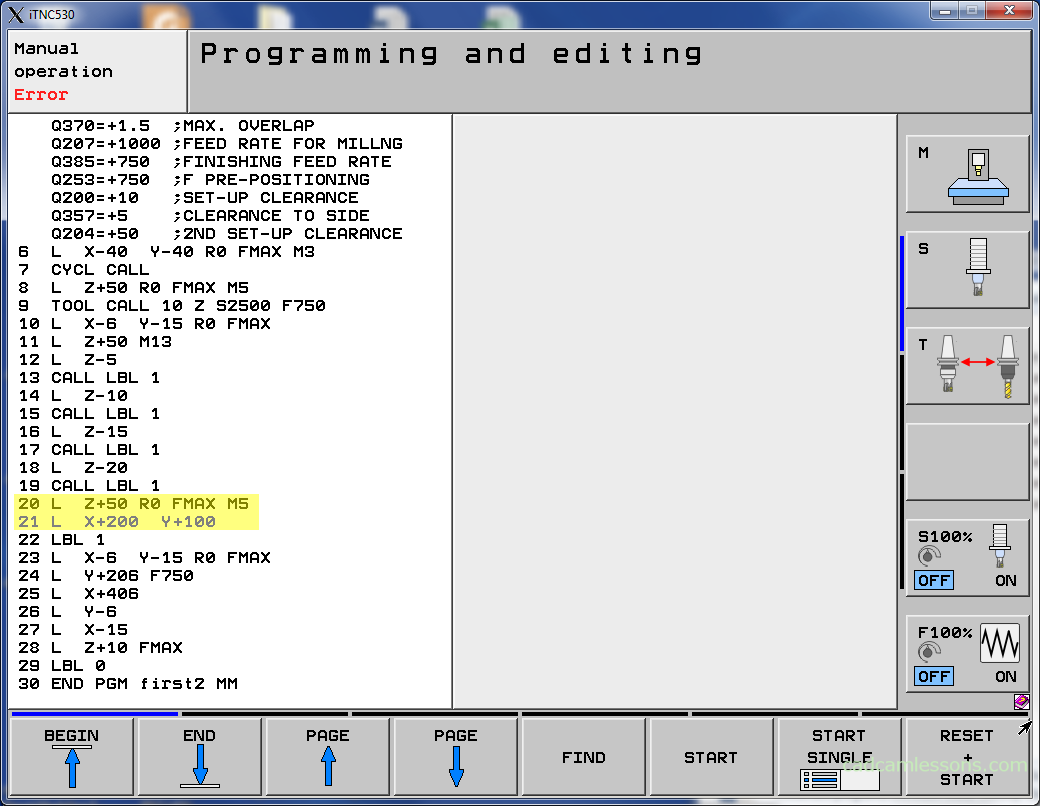
Again, select L(ine) button and enter X+200 Y+100, and press END button.
Now, press the CYCL DEF button.
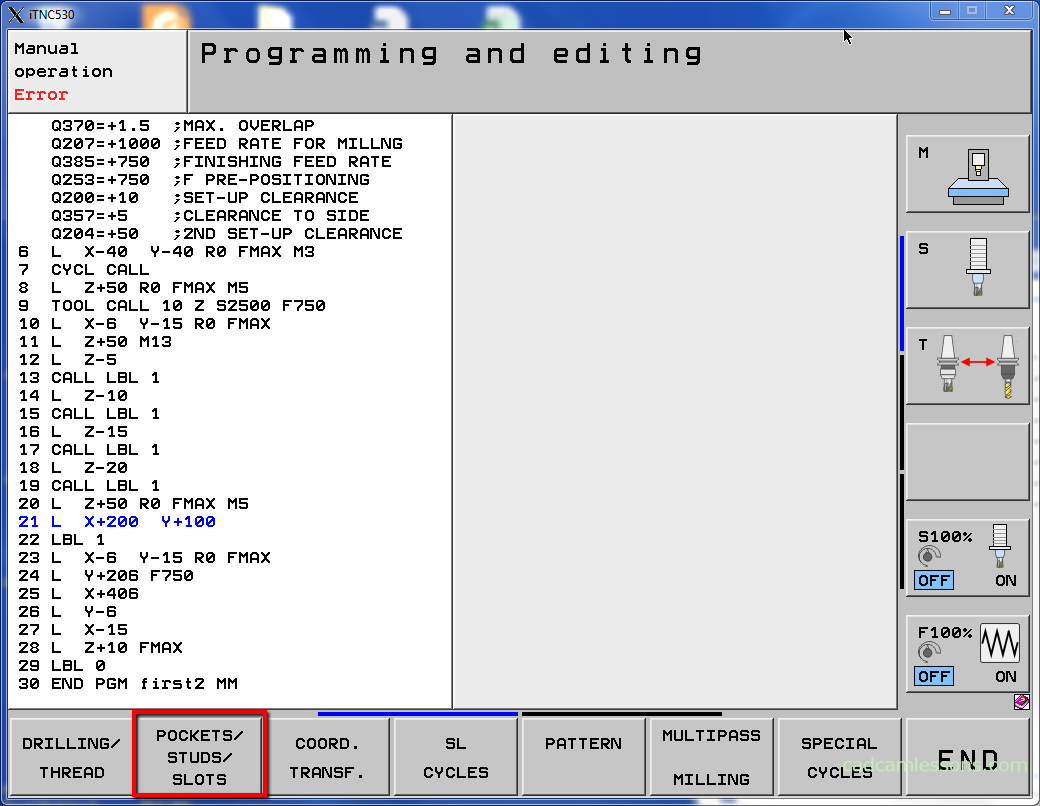
Select POCKETS/STUDS/SLOTS softkey.

Select cycle 251.
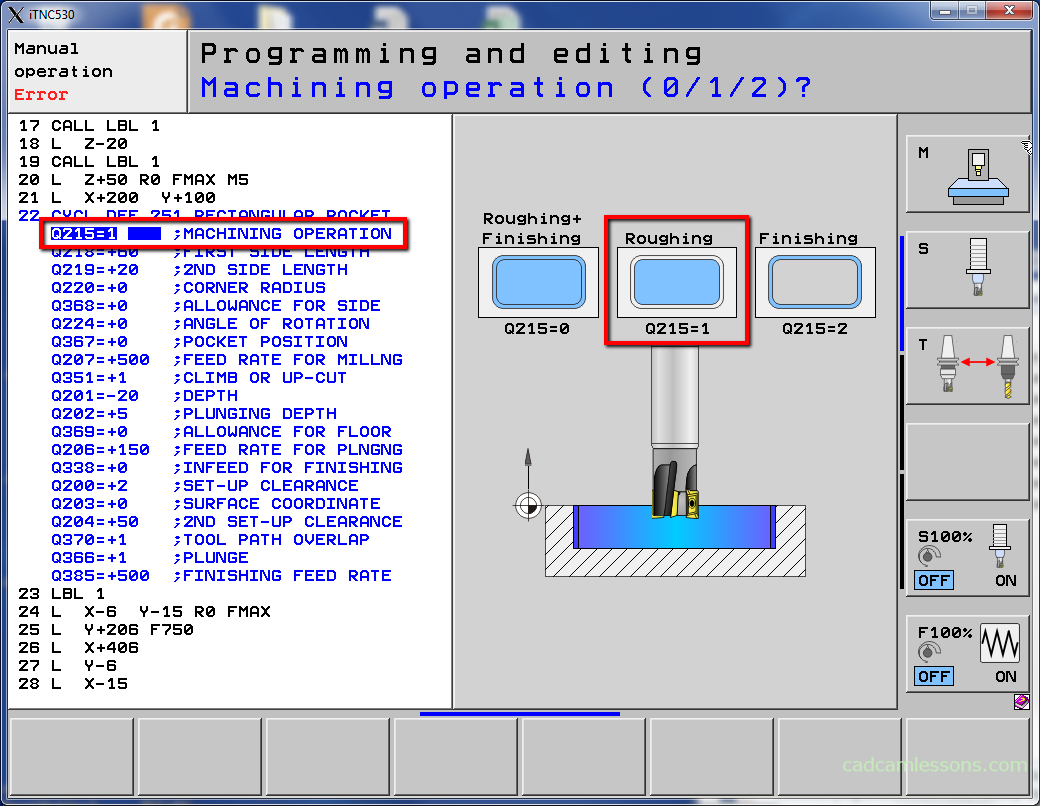
First parameter is Q215 Machining operation. We have three options here.
0 – Roughing + Finishing
1 – Roughing
2 – Finishing
Now, we will prepare only roughing operation. Press 1 to select this kind of machining.
Next parameter is the first side length – Q218.
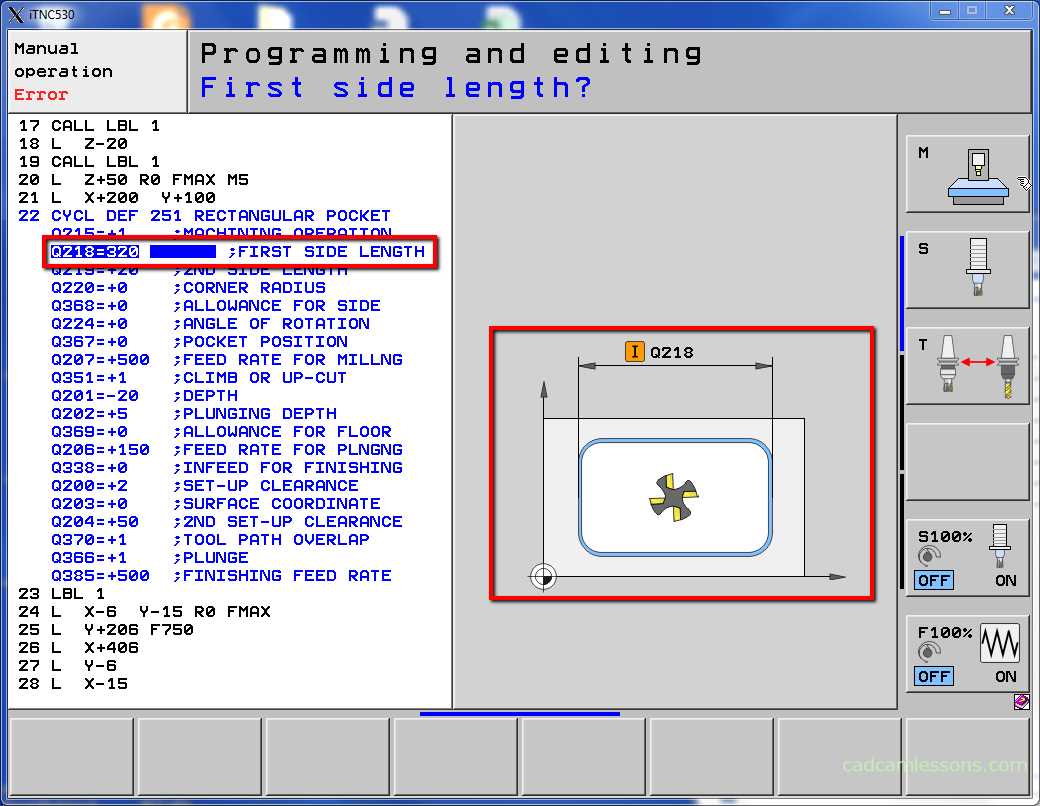
Enter 320 and press ENT button to accept.
Next parameter is the second side length – Q219.
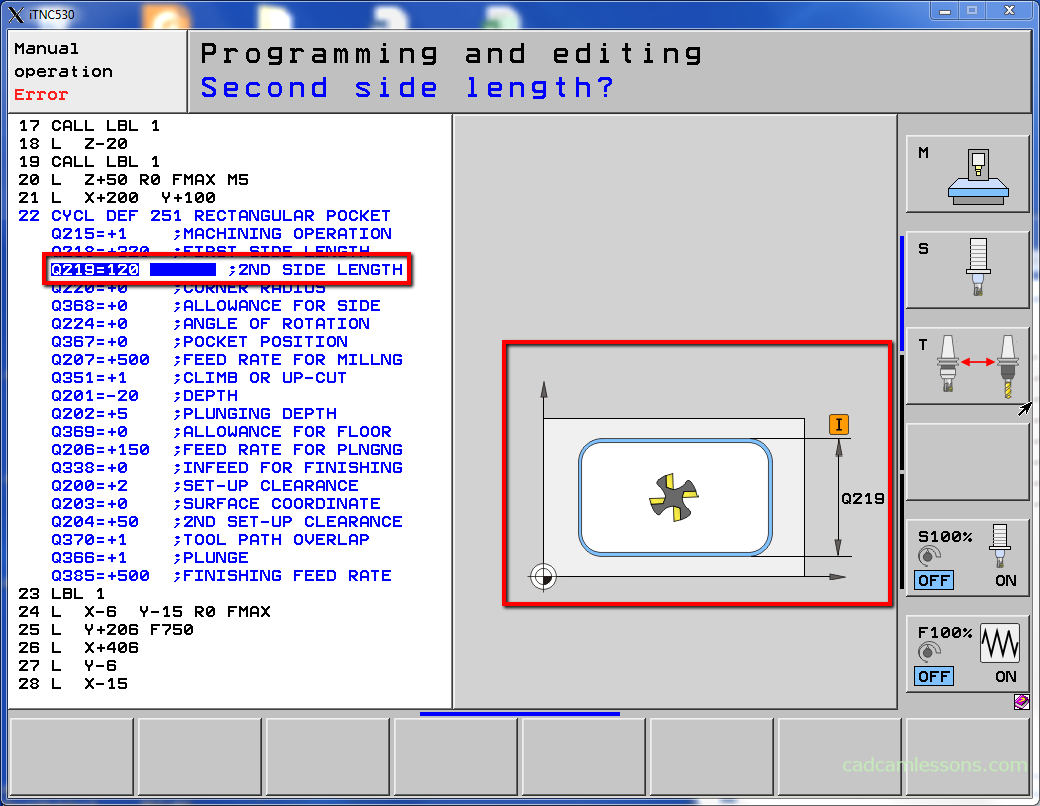
Enter 120 and press ENT button.
Next parameter is the corner radius – Q220.
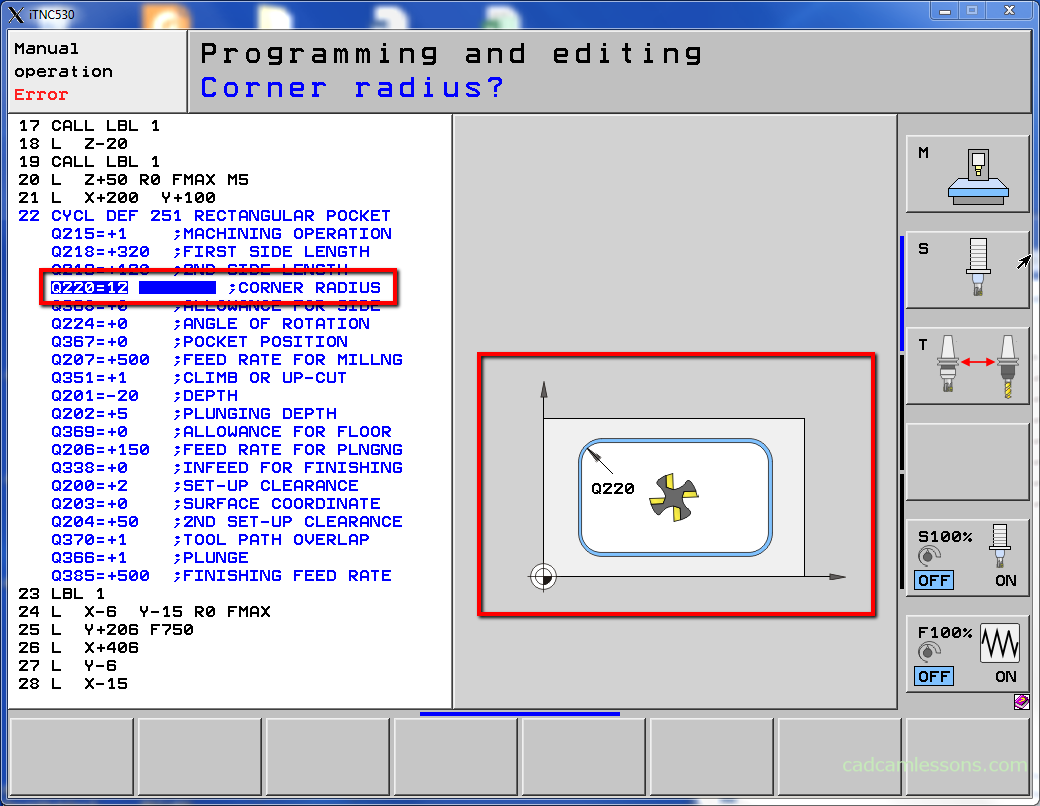
Enter 12 and press ENT button.
Next parameter is the allowance for side – Q368.
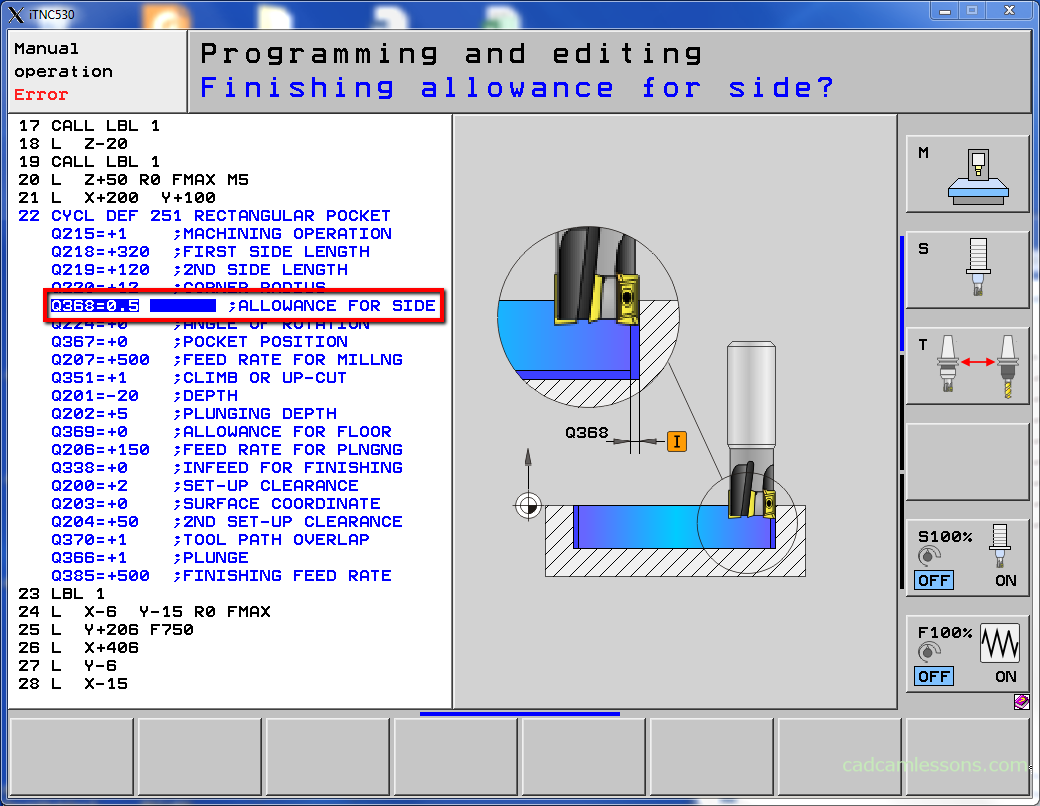
This is an allowance for finishing machining.
Enter 0.5 and press ENT button.
Next parameter is the angle of rotation – Q224.

We do not want to rotate the pocket, so leave the value 0 and press ENT button.
Next parameter is the pocket position – Q367.

This is the position of the pocket in relation to the tool position at the cycle call.
Select 0 and press ENT button.
Next parameter is feed rate for milling – Q207.
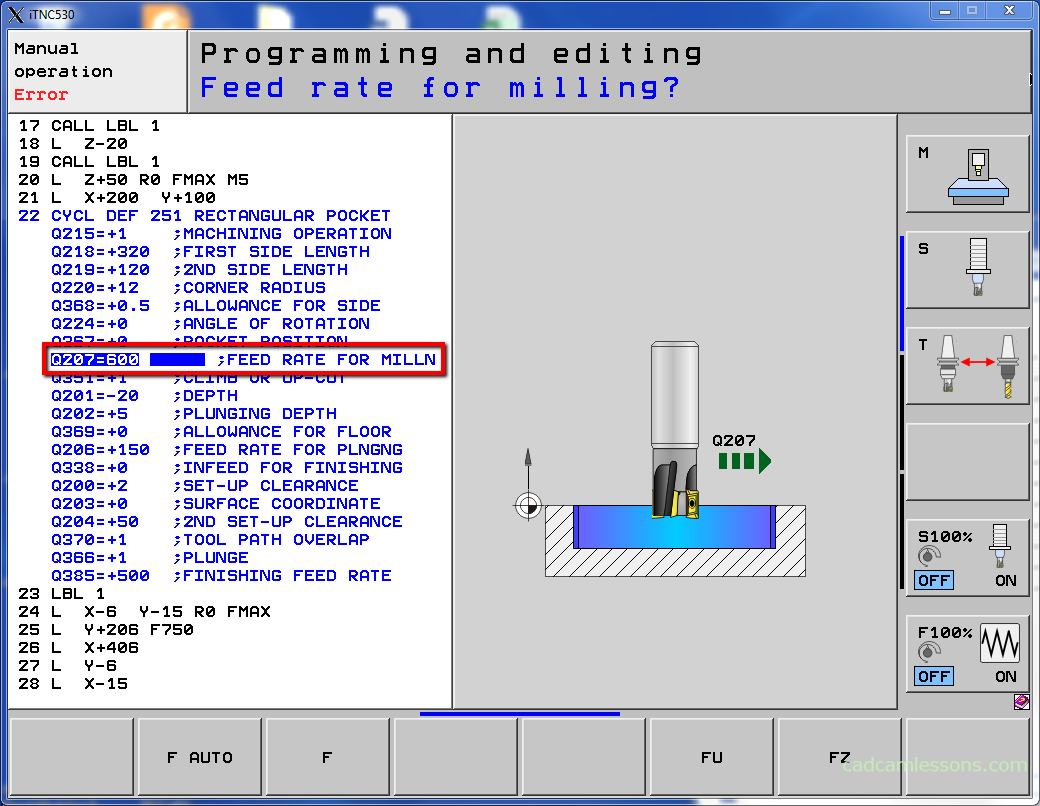
Enter 600 and press ENT button.
Next parameter is the direction of machining. You can choose between climb or conventional milling.

Select +1 for climb milling and press ENT button.
Next parameter is the depth of pocket.

Enter -10 and press ENT button.
Next parameter is the plunging depth – Q202.
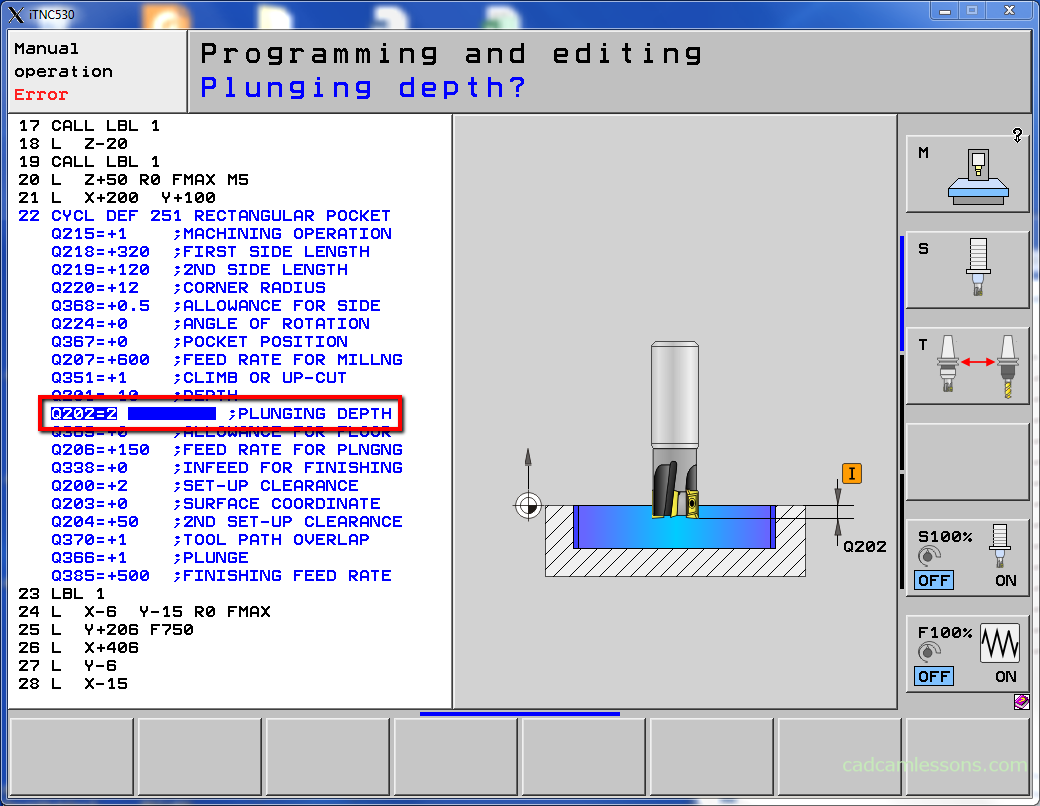
Enter 2.
This is the depth of one pass. This means that the machining of this pocket will be done in five passes.
Press ENT button.
Next parameter is the allowance for floor – Q369.
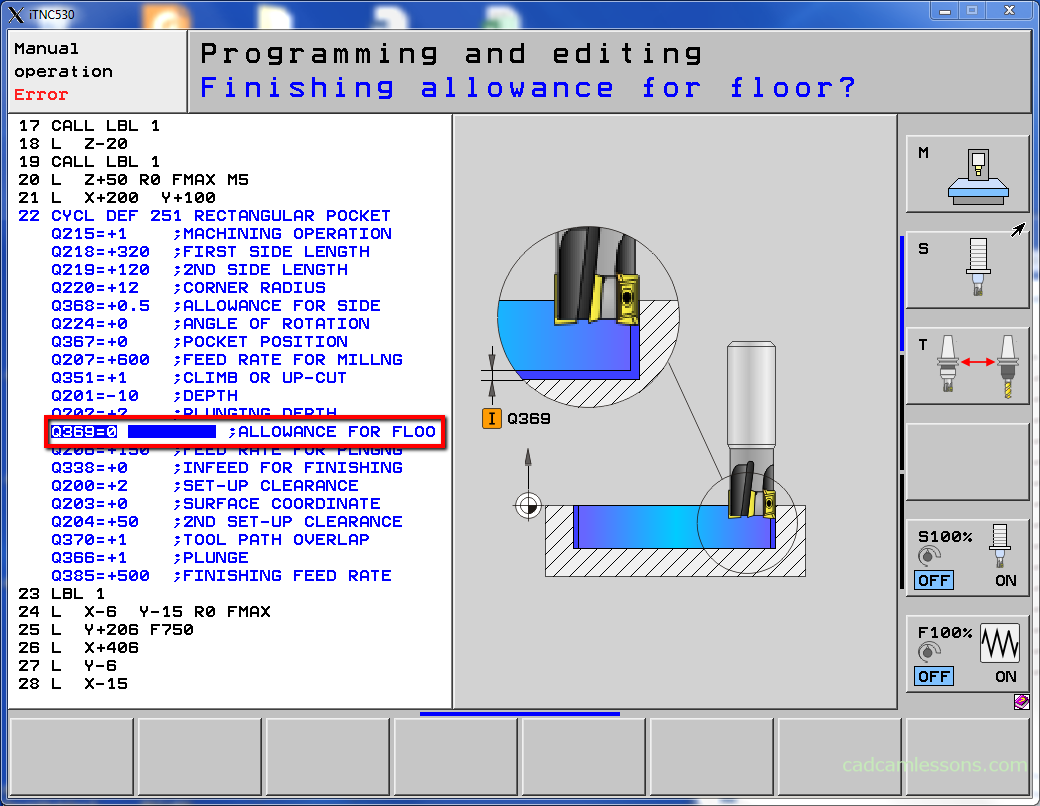
Enter 0 and press ENT button.
Next parameter is the feed rate for plunging – Q206.
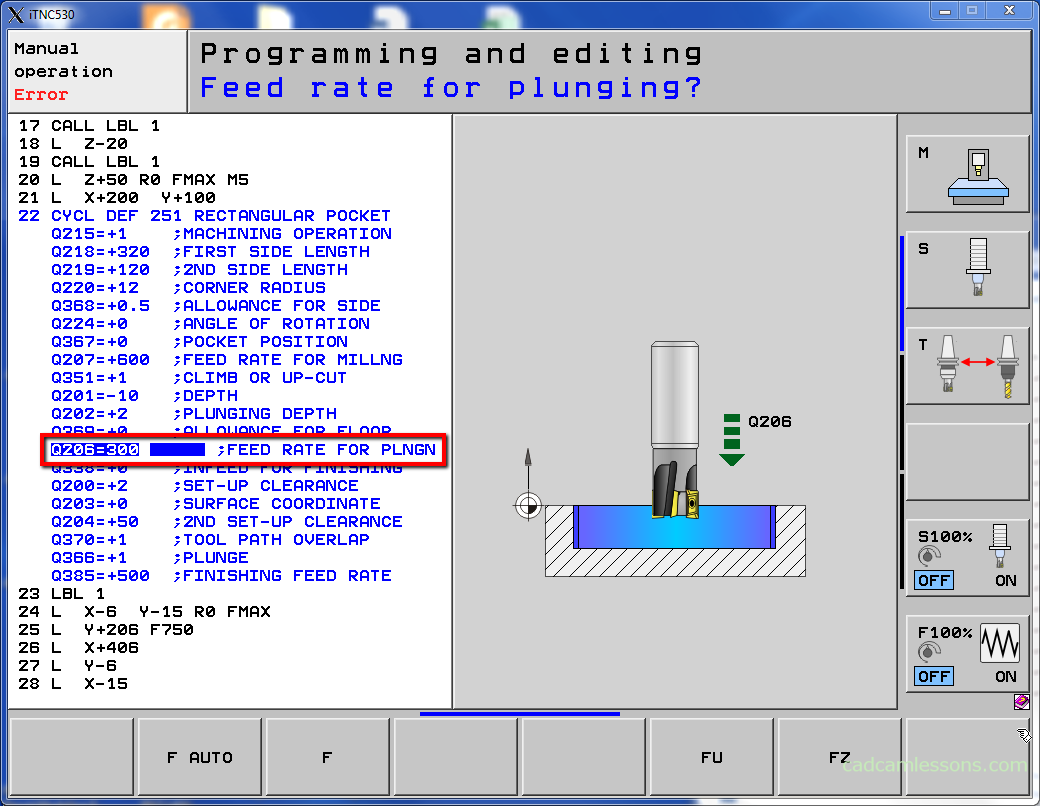
Here we set a different feed rate value for the tool entry into the material
Enter 300 and press ENT button.
Next parameter is the infeed for finishing – Q338.
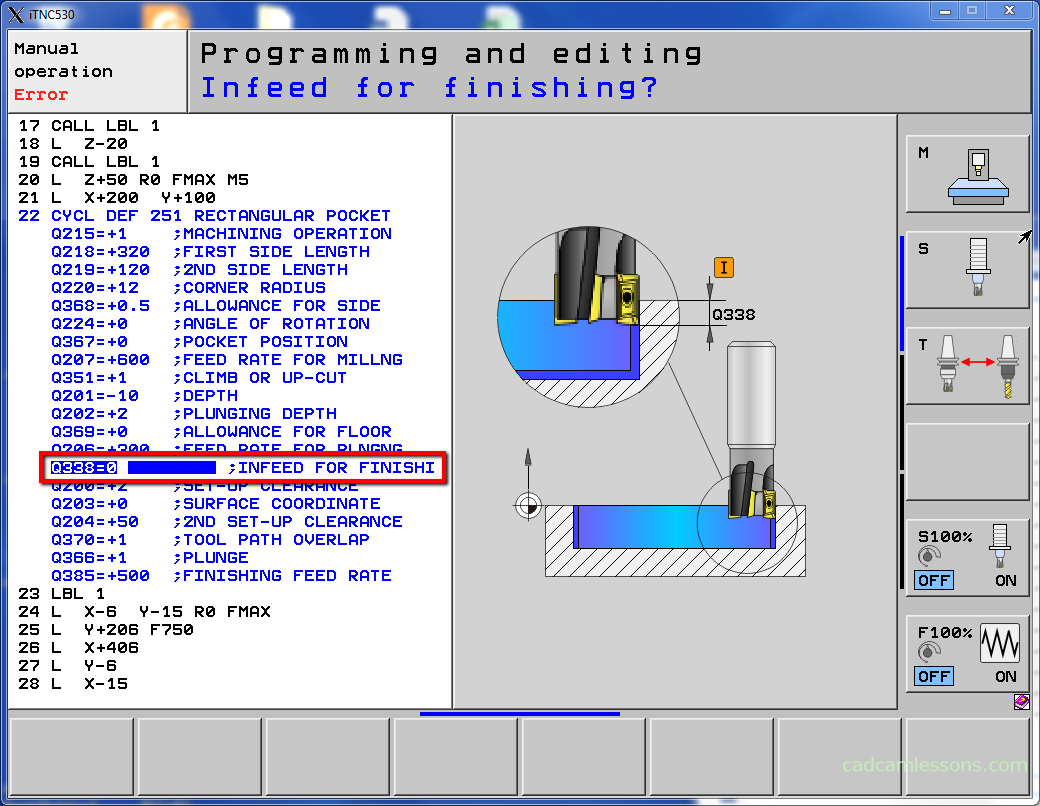
This is the depth off pass in finishing machining. Value 0 means finishing machining with one pass only.
Enter 0 and press ENT button.
Next parameter is the set-up clearance – Q200.

This is the distance between the tool and the workpiece.
Enter 10 and press ENT button.
Next parameter is the workpiece surface coordinate – Q203.

This is the Z level on which the pocket begins.
Enter 0 and press ENT button.
Next parameter is the second set-up clearance – Q204.

This is the distance from the workpiece on which the tool can move safely and there is no collision between the tool and the fixtures.
Enter 30 and press ENT button.
Next parameter is the tool path overlap factor – Q370.
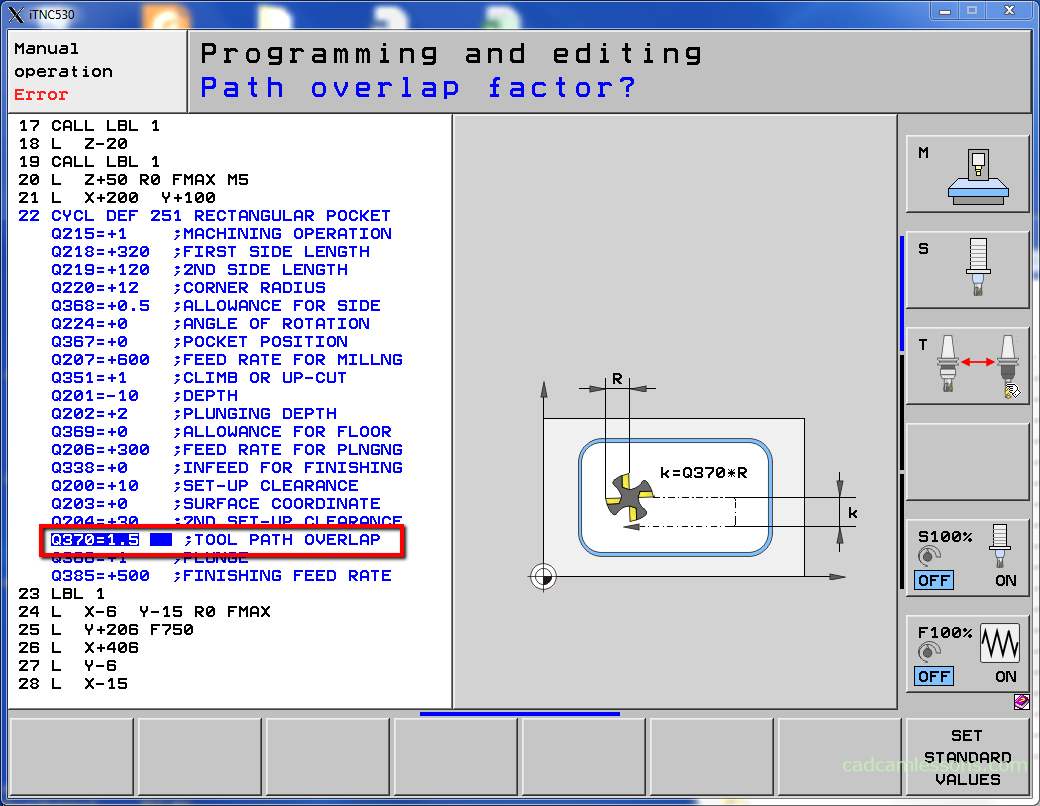
Enter 1.5 (it means overlap = 1.5 * tool radius) and press ENT button.
Next parameter is the plunging strategy – Q366.
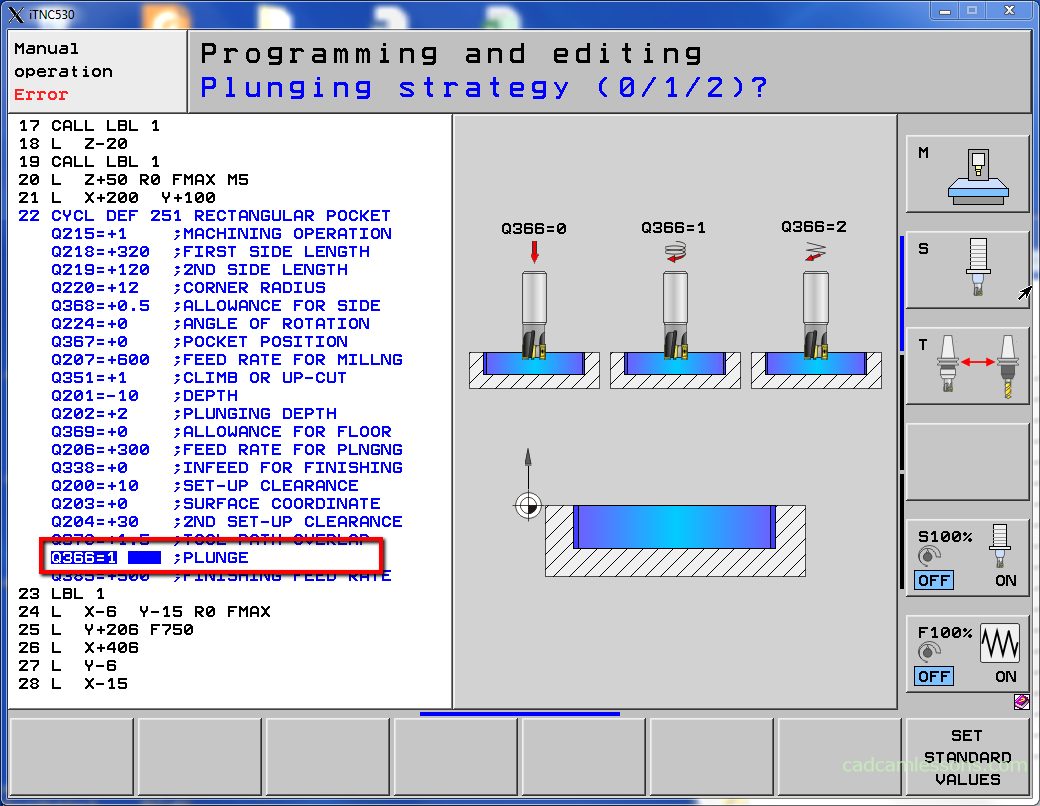
Select 1 for helical entry and press ENT button.
Last parameter is the finishing feed rate – Q385.

We can leave default value for finishing feed rate because we have only roughing machining.
Press END button to finish cycle definition.
Now we have to call cycle.
Press CYCL CALL button.
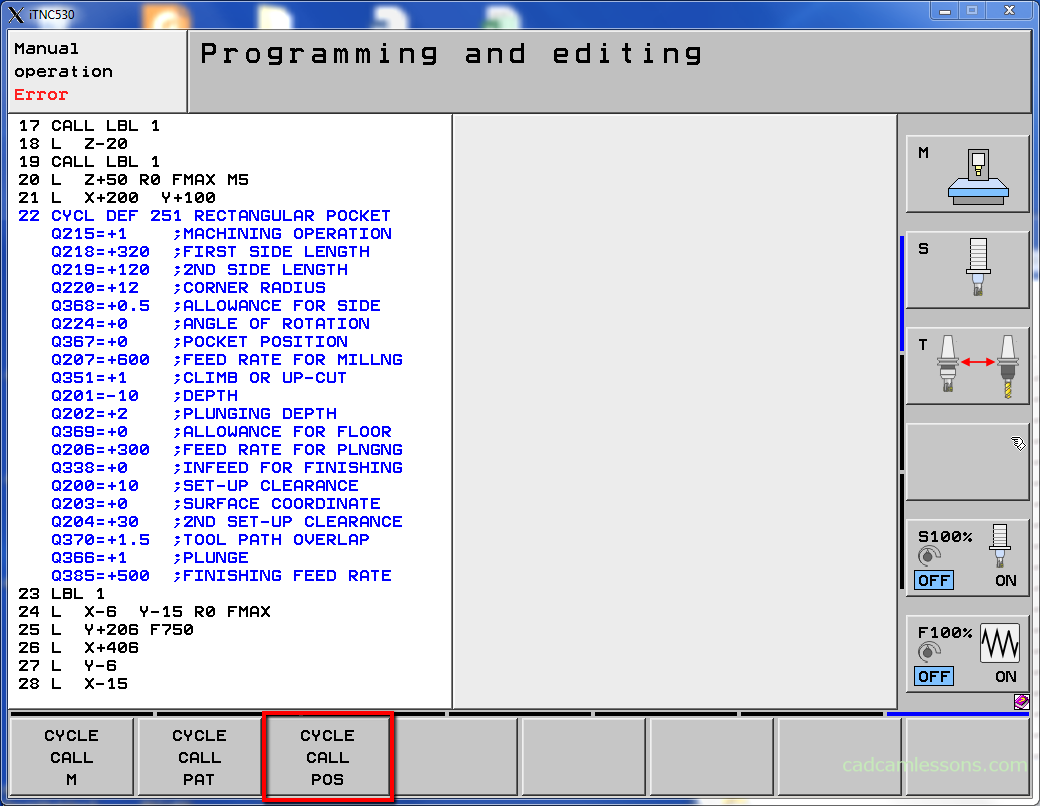
Select CYCLE CALL POS to call cycle and set tool position (for Q367 parameter).
Enter CYCL CALL POS X+200 Y+100 Z+0 FMAX M3 and press ENT button.
Save program and run simulation.
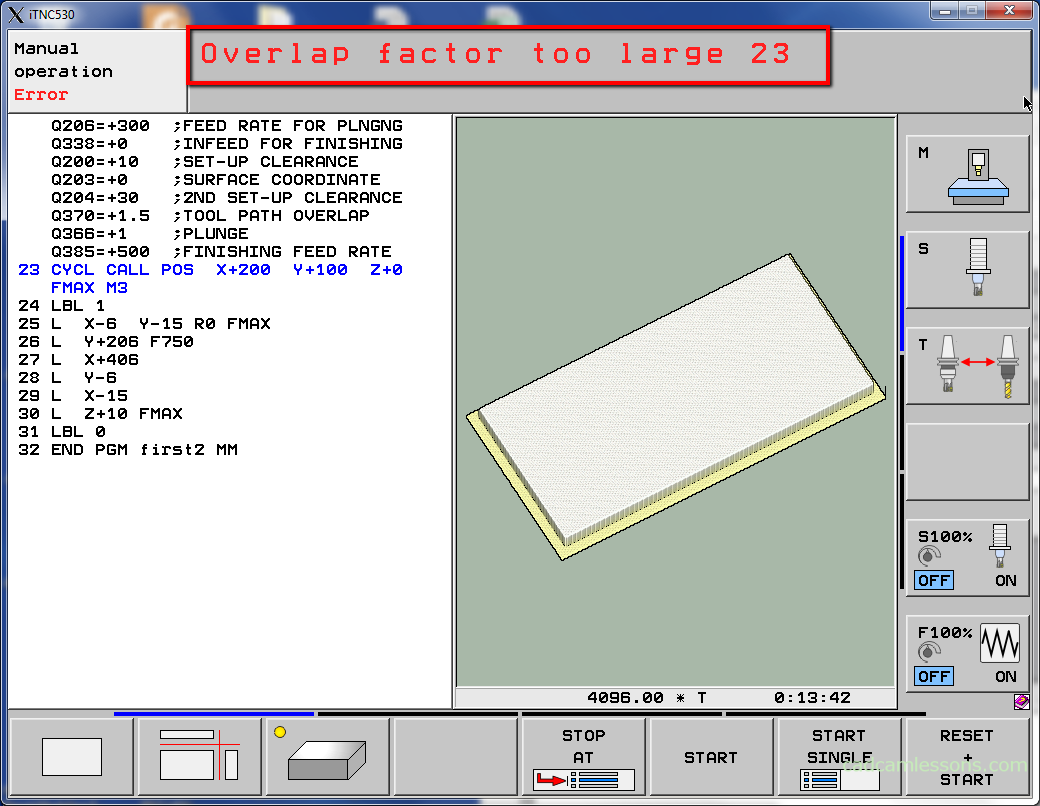
There is the warning message. Tool path overlap factor is to large. Let’s change parameter Q370 to 0.7 value.
Back to Programming and editing mode.
And edit parameter Q370.

Again, save program and run simulation. Now all looks fine.
If you find my tutorials helpful, you can support CADCAMLessons:
https://ko-fi.com/cadcamlessons