Tool-in and tool-out in Alphacam
YouTube: https://youtu.be/pirFRixRVvQ
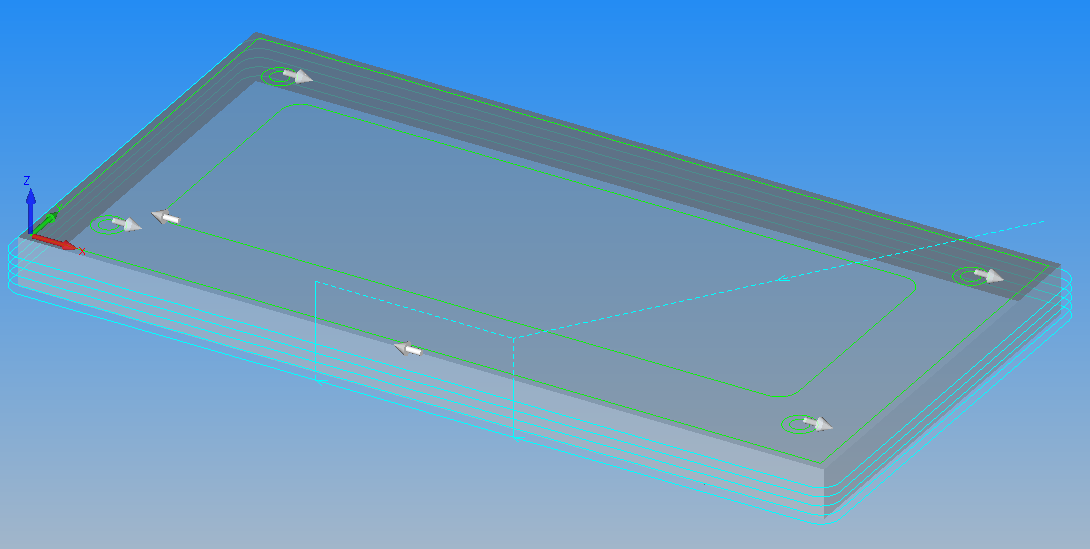
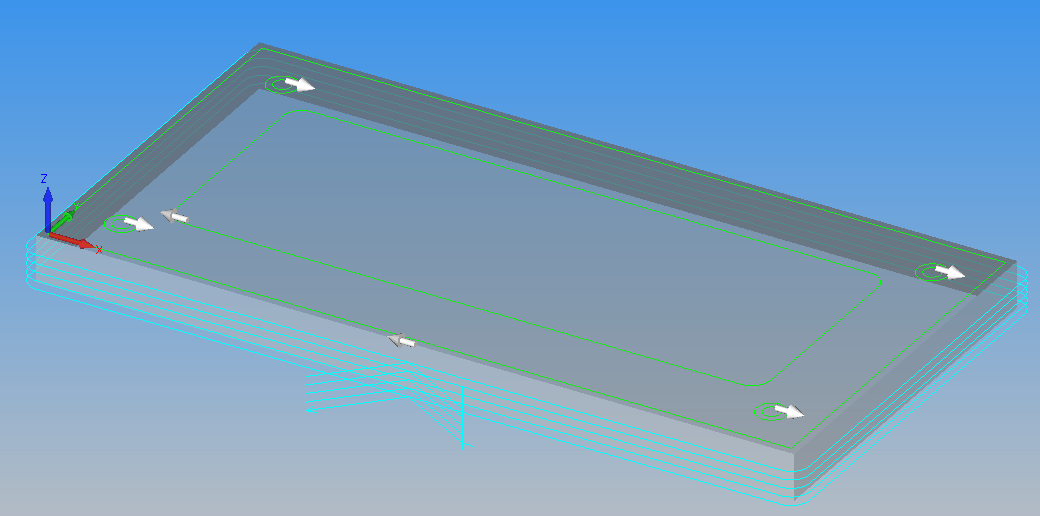
We finished the last lesson like this:
Now we have to change the type of tool-in and tool-out.
Click RMB on operation in Project Manager and select Edit.
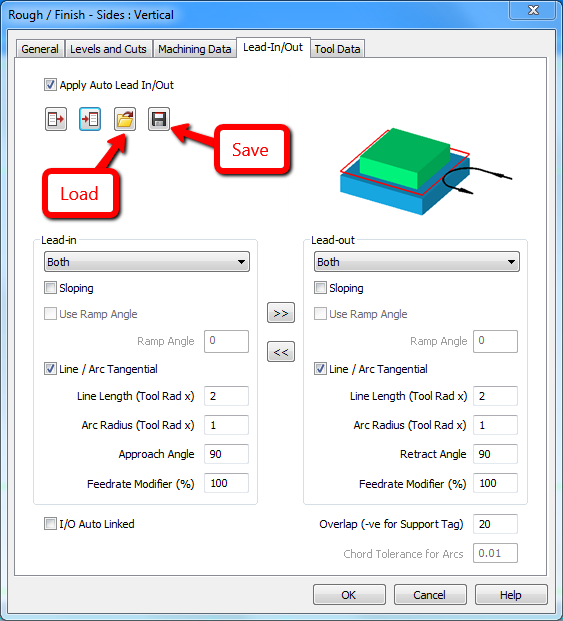
Select Lead-In/Out tab.
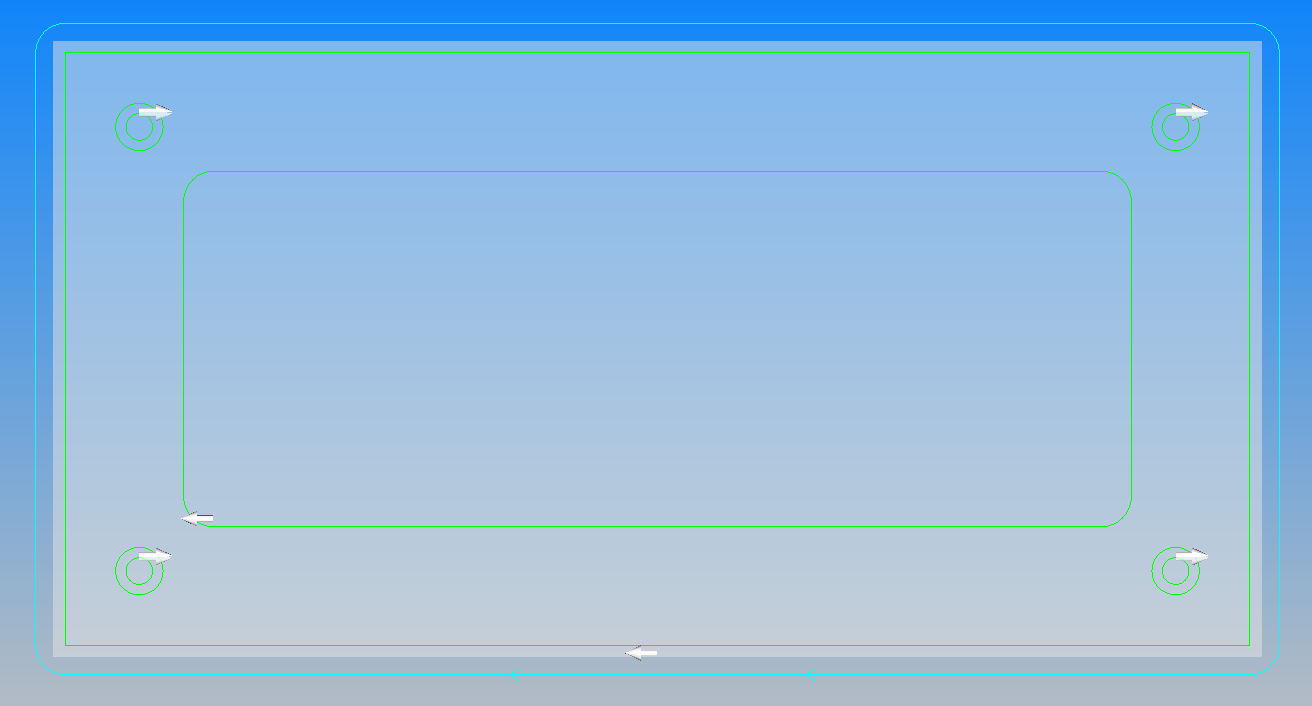
At the beginning we can change the Approach Angle and Retract Angle. For Lead-in let’s change to 30 degrees and for Lead-out change to 45 degrees.
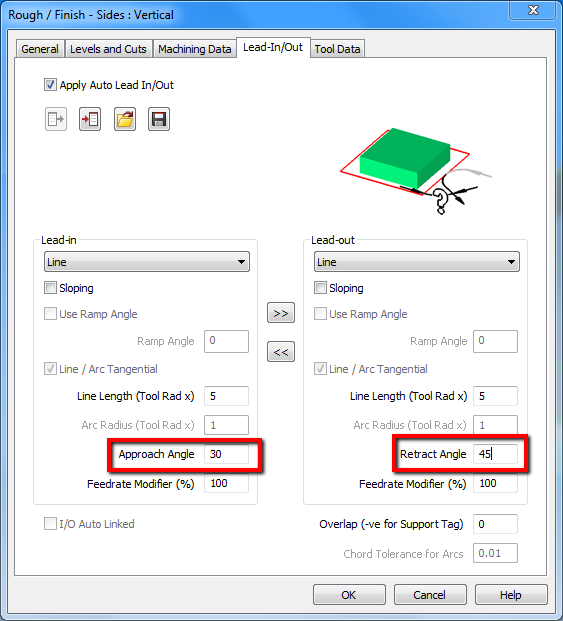
Click OK.
We will get a tool path as shown below.
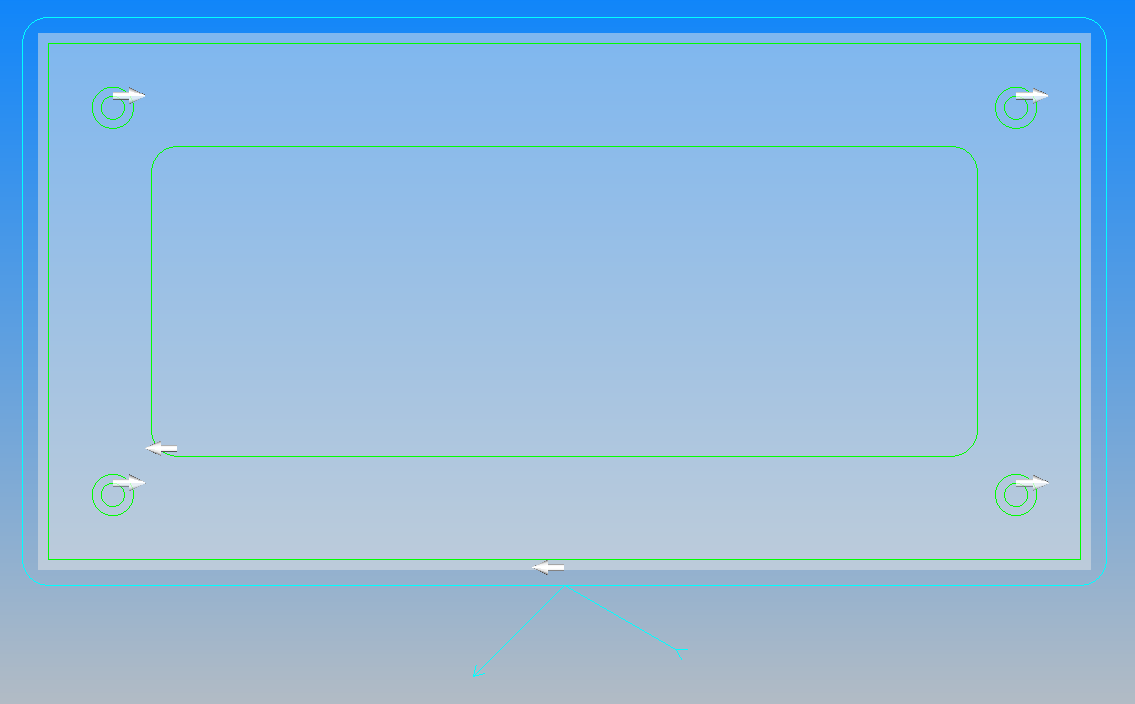
And Iso view…
Quite good.
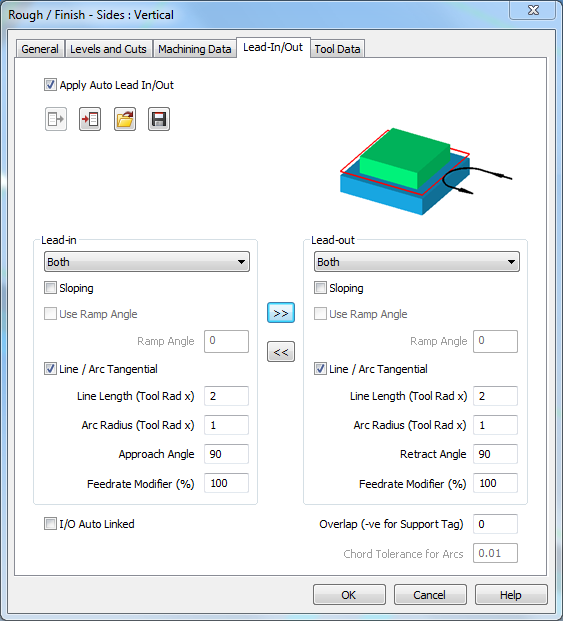
Edit Lead-in and Lead-out again. Fill the window as shown below.

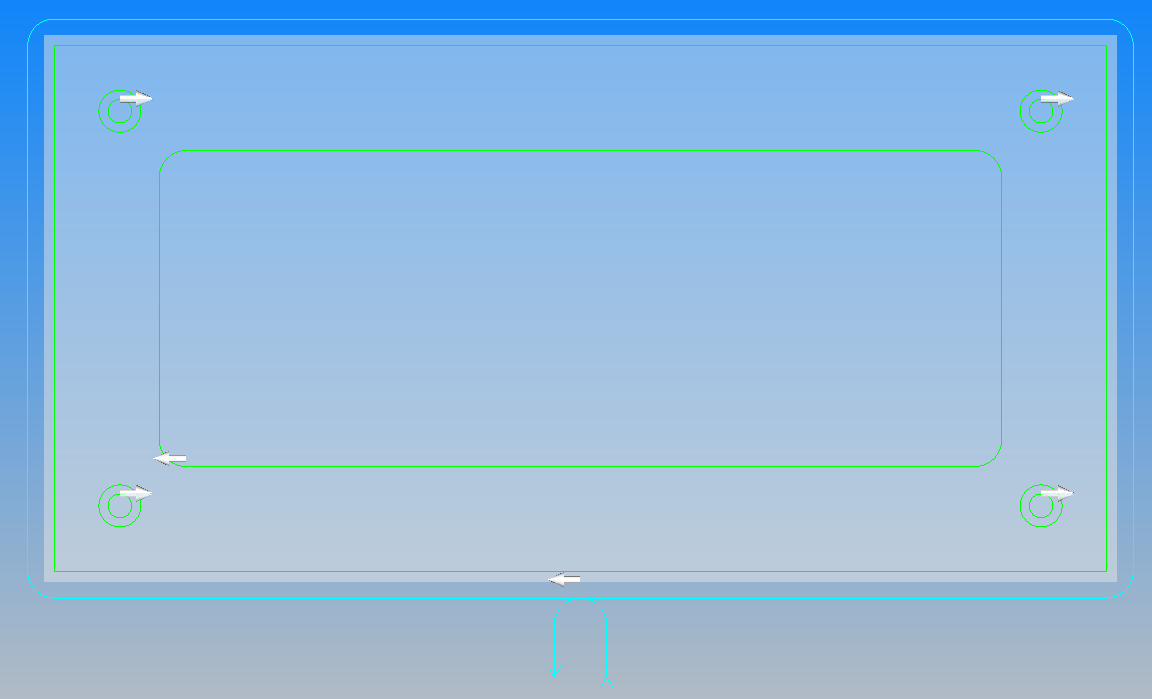
We should get something like in the picture below.
XY View:
And Front view:

This is the effect of Sloping option.
Let’s check the next settings for Lead-in and Lead-out.
Fill the window as shown below.
We should get something like in the picture below.
There is also one useful option here – Overlap.
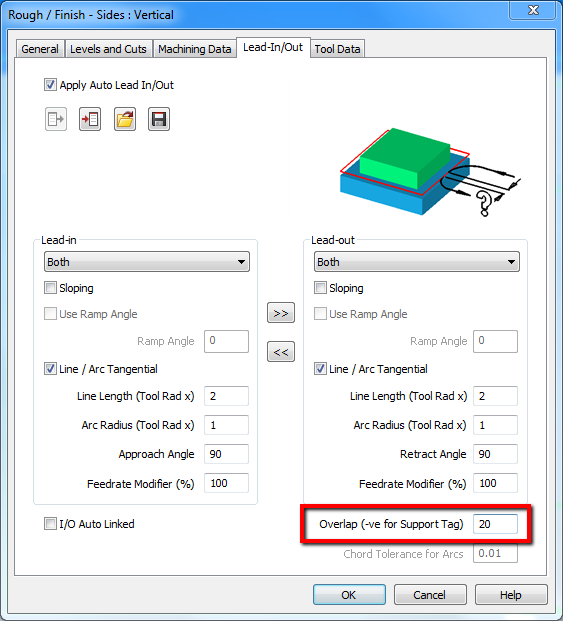
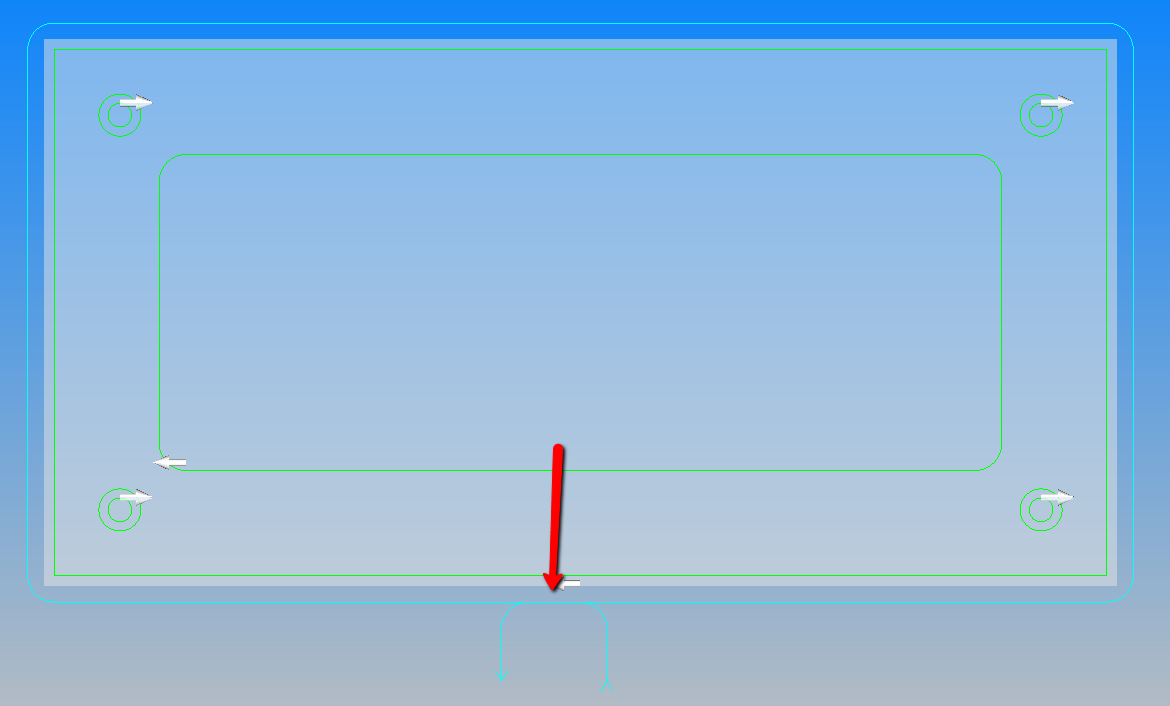
Click OK and we should get something like in the picture below.
Feedrate Modifier also could be useful. This parameter allows us to reduce the feed rate for the tool in and tool out.
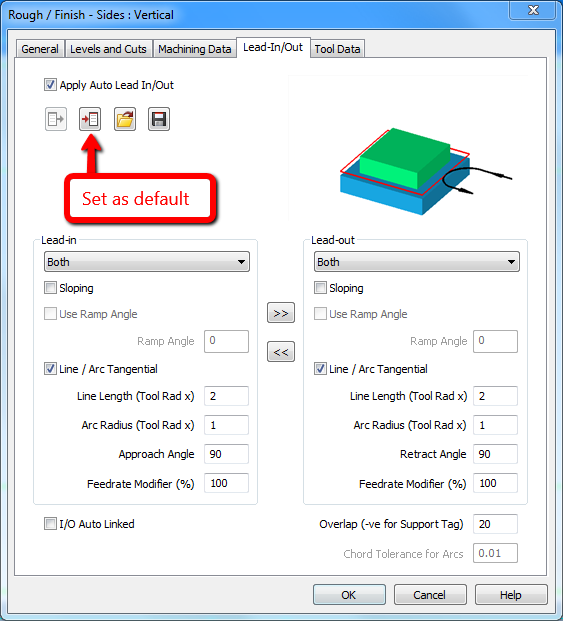
If you often use the same parameters, you can set them as default by clicking Set as Default button.
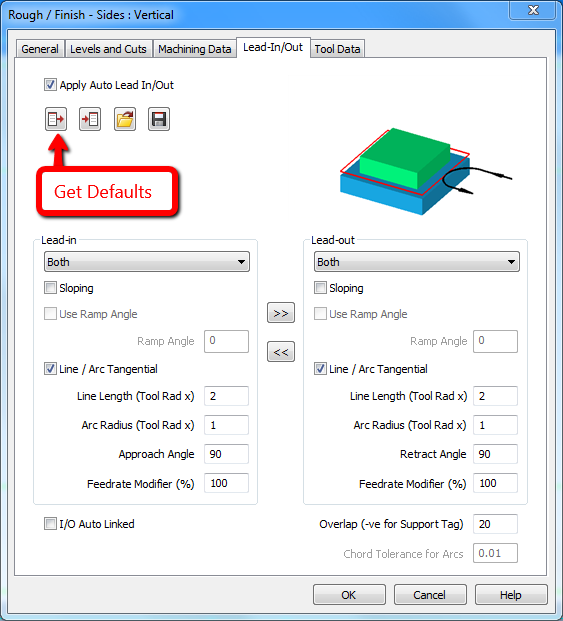
To use the default parameters, click Get Defaults button.
You can also save and use these settings again later.
These were basic information about the entry and exit of the tool. I hope that it will help you work with Alphacam.
Subscribe me on YouTube!
Watch the video below!
If you find my tutorials helpful, you can support CADCAMLessons:
https://ko-fi.com/cadcamlessons