
Order by Depth Fusion 360
Order by Depth
In the case of machining several separate parts segments, we can determine in which order the machining is to be performed.
In the above figure, we have two areas. We can prepare the tool path so that the first area (in this case the contour) is machined at full depth completely before we proceed to the next contour machining. This is how it is done in the example shown in the figure above.
The option of Order by Depth, which in the above case was deselected, is responsible for this. So the order was followed by the area.
If we select this option.

We will receive the machining in a way where the first area is first machined to the depth of the first pass, then the tool retracts and travels to the next area and there goes the first pass depth machining, if there are more areas, the tool travels to the next, etc.
As soon as it is at the last area, it will perform the machining to the depth of the first pass, and then immediately to the depth of the second pass and go to the next area and there it will process the depth of the second pass, etc.
Of course, we will have a lot more movements in the air here, but there are situations where this kind of machining is necessary. For example, thin-walled elements, in which to keep the dimension or even be possible to do, you should process each side of the wall evenly.
If we first machined one side to the full depth, then when machining on the other side of the wall, problems could arise in the form of vibrations, “material would run away” or simply to break the wall.
In the case of thin-wall elements machining, we can handle using the above method or a little automating this process.

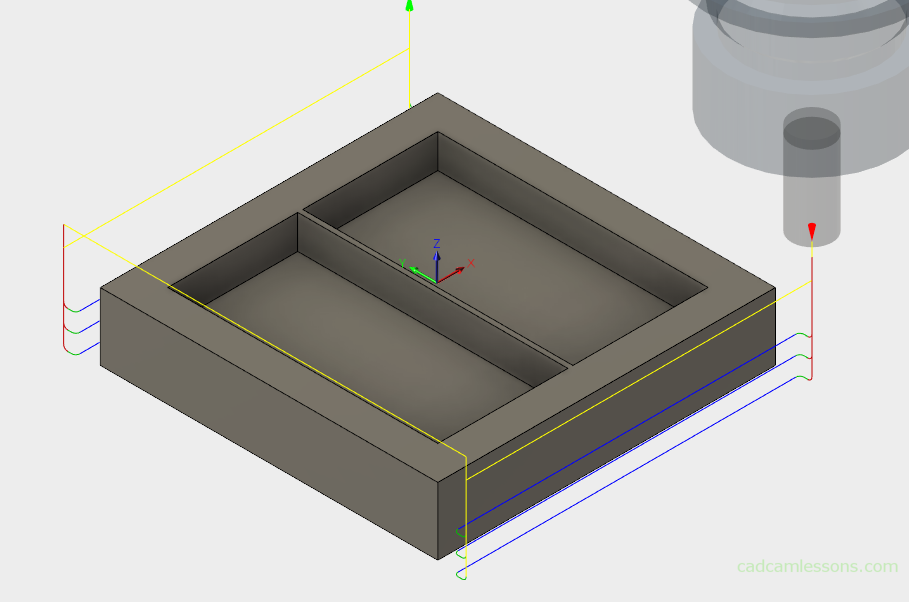
In the above figure we have a standard machining of two internal contours, between which there is a thin wall, 1.5 mm thick. Using the standard machining, the first contour will be machined first at full depth, then the tool will pass to the next contour and start machining. There is a high risk that the wall after machining will not have the dimension assumed, and if the pockets were deeper, there would be a risk that part of the wall would be torn out. We can deal with this by using the Order by Depth option or by using the Use Thin Wall option.
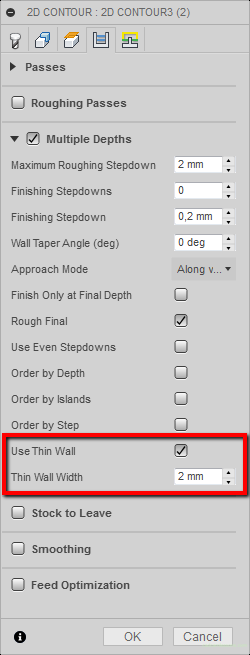
After selecting this option, another Thin Wall Width parameter is activated, in which we can determine the wall thickness below which the wall will be considered thin.
If you have entered 2 mm, all walls having a thickness less than 2 mm will be treated as thin and machining will be prepared automatically using the thin-wall machining strategy.

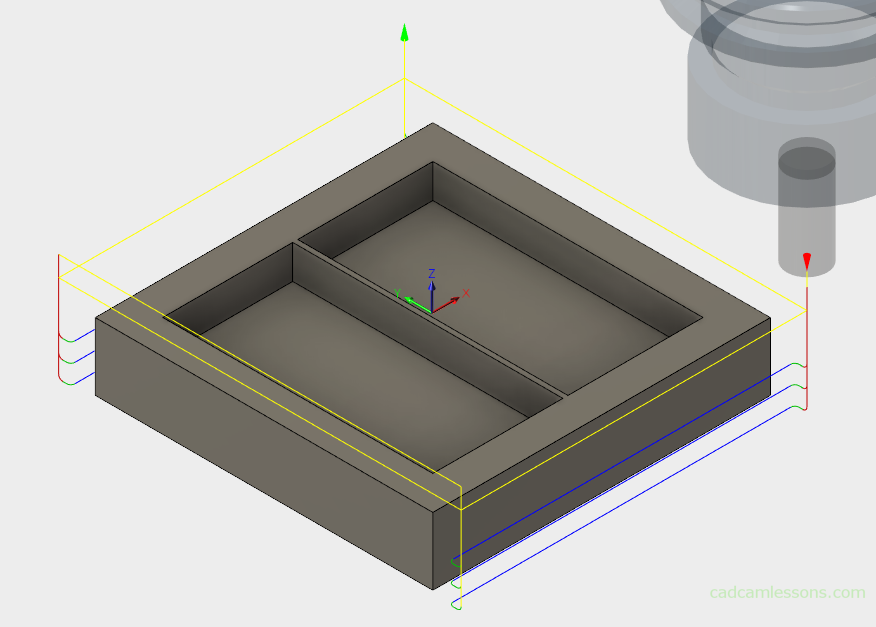
This is the example shown in the figure above. First, the first contour will be machined to the depth of the first pass, then the tool will retract and process the second contour to the depth of the first and second pass. Then move to the first contour and machining to the depth of the second and third passes, etc.
In this way, the wall will be evenly machined on each side.

However, if we set the thickness of the wall to 1 mm, our wall thickness of 1.5 mm will not be treated as thin and the processing will take place in a standard way.

First, the first area will be machined at full depth, then the second area will be machined.
The Use Thin Wall option has the advantage of automatically recognizing whether to apply a thin-wall machining strategy or use standard machining.
Whether in a manual or automatic manner, in any CAM system (or even without a system), we can prepare machining similar to the machining strategy of the thin-walled elements presented above. Some CAM systems have these options, in others you may have to get a little tired. But theory is theory, and practice is practice. It will not always be as colorful as in the CAM system. The most important thing is to have an idea how to approach the problem.
Order by Step
Another option that can be useful is the Order by Step option.

By selecting this option, rough passes will be performed first and then finishing passes.
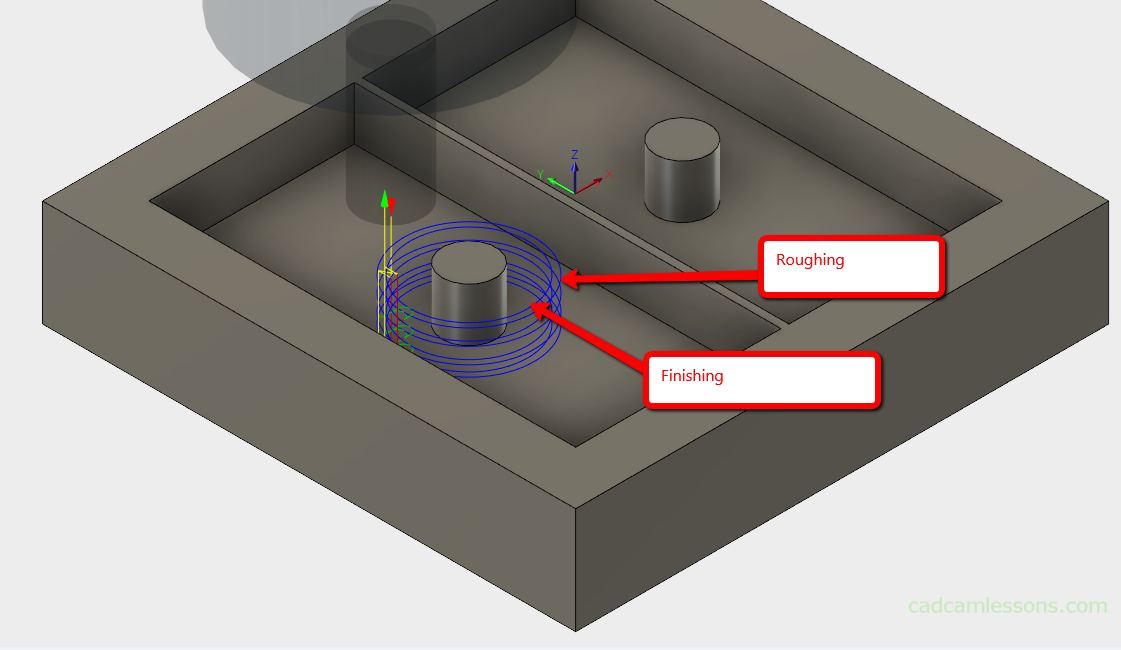
In other words, first, external transitions, farthest from the contour, are made to reach the full depth, and then those closer to the contour. If we did not select this option, the machining would be performed and the method would be done that the roughing passes to the first step depth was made first, then the finishing pass to the depth of the first step. Subsequently, the roughing passes to the depth of the second step and the finishing pass to the depth of the second step, etc.
If you find my tutorials helpful, you can support CADCAMLessons:
https://ko-fi.com/cadcamlessons