If you find my tutorials helpful, you can support CADCAMLessons:
https://ko-fi.com/cadcamlessons
Bolt Hole Circle – Lesson 7 – Alphacam Router Tutorial
YouTube: https://youtu.be/oXVRcu8JzUs
We will now draw circles with a diameter of 9 and 15 mm, lying on a circle with a diameter of 150 mm. There is a function in Alphacam that makes it easier.
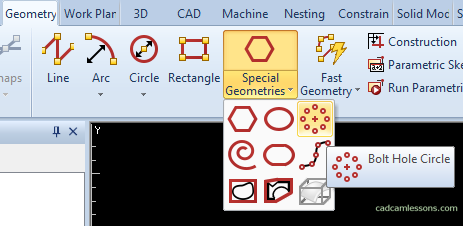
From the Geometry tab, expand the Special Geometries option and select Bolt Hole Circle.
Enter 150 as the Pitch Circle Diameter, enter 9 as the Diameter of Holes, enter 12 as the Number of Holes, and enter 0 for the Angle for First Hole.
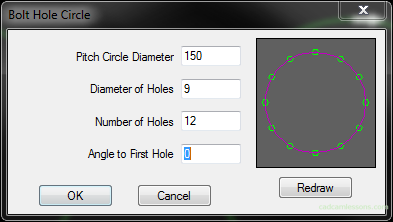
Click OK.
Now we have to specify the center of this circle. It will be in the middle of an existing circle. Therefore, use the Arc CENTER of snap and point to the circle.
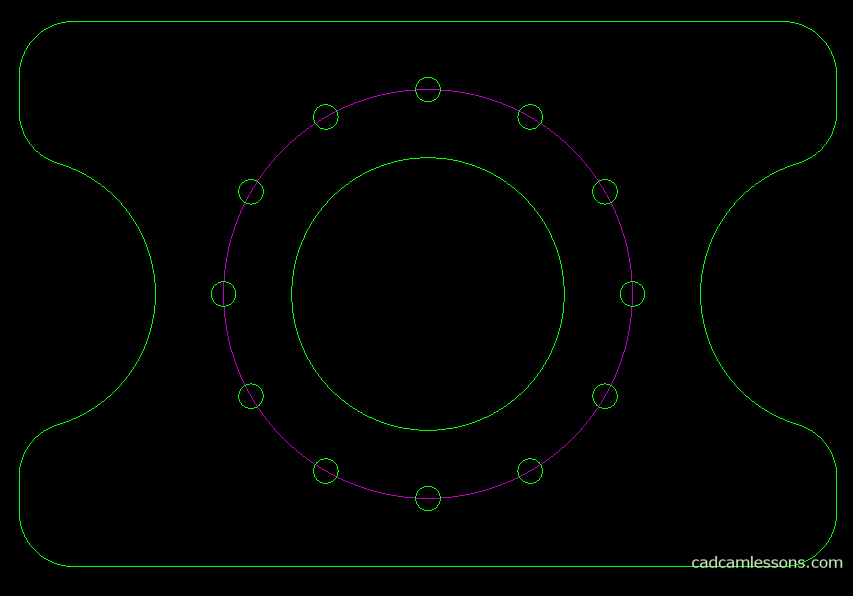
Repeat the same for circles with a diameter of 15 mm. So once again select the Bolt Hole Circle option. Alphacam should remember the previous parameters. Change only the diameter of the hole to 15 and click OK.
Again, use the circle Arc CENTER of snap to specify the center of the circle on which the holes are.
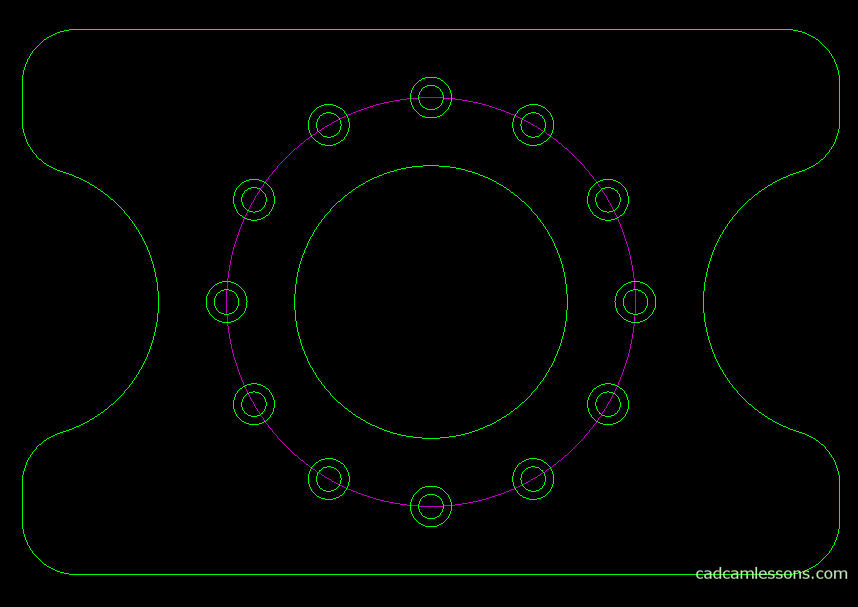
And in this simple way, we received small circles lying at even intervals on a larger diameter circle.
While drawing circles, let’s draw circles with a diameter of 11 and 17 mm.
Select drawing a circle using the Center + Diameter option.
As the circle diameter, enter 17 and click OK. The centers of these circles are offset 20 mm from the corners of the rectangle, i.e. they lie in the centers of roundings with a radius of 20 mm.
To determine the center of the circle, use the Arc CENTER of snap. After selecting the snap, simply indicate the fillet and the center will be found automatically. Repeat for the other circles.
Now repeat for circles with a diameter of 11 mm.
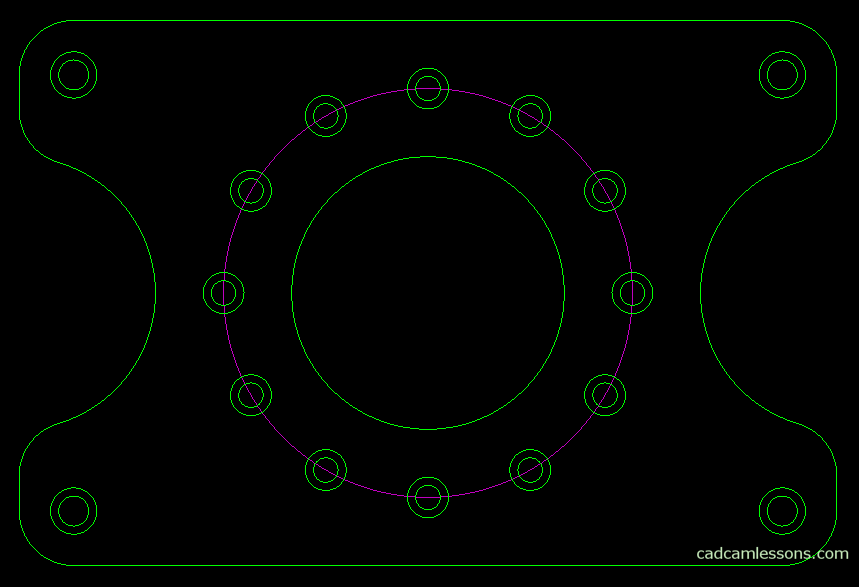
Well, our first drawing is ready.