If you find my tutorials helpful, you can support CADCAMLessons:
https://ko-fi.com/cadcamlessons
2D Pocket – Fusion 360
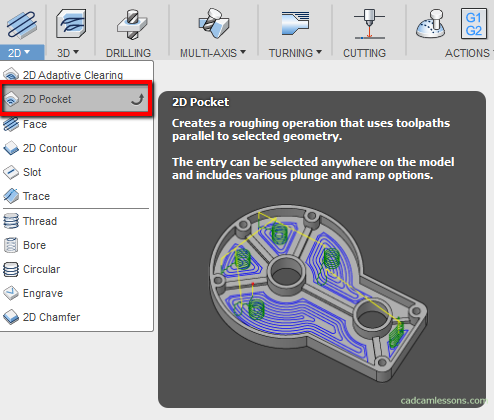
With this post, we will begin pocket machining on CAM systems based on Autodesk Fusion 360. Pocket machining is the removing material inside a closed contour.
To add a pocket machining operation from the 2D menu, select 2D Pocket.
A window will appear, already known from previous operations.
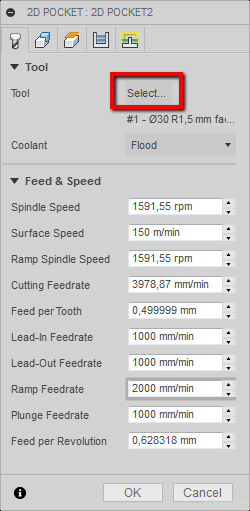
The tool has been saved from the previous operation. We can change them to process the pockets. Click on the Select button.
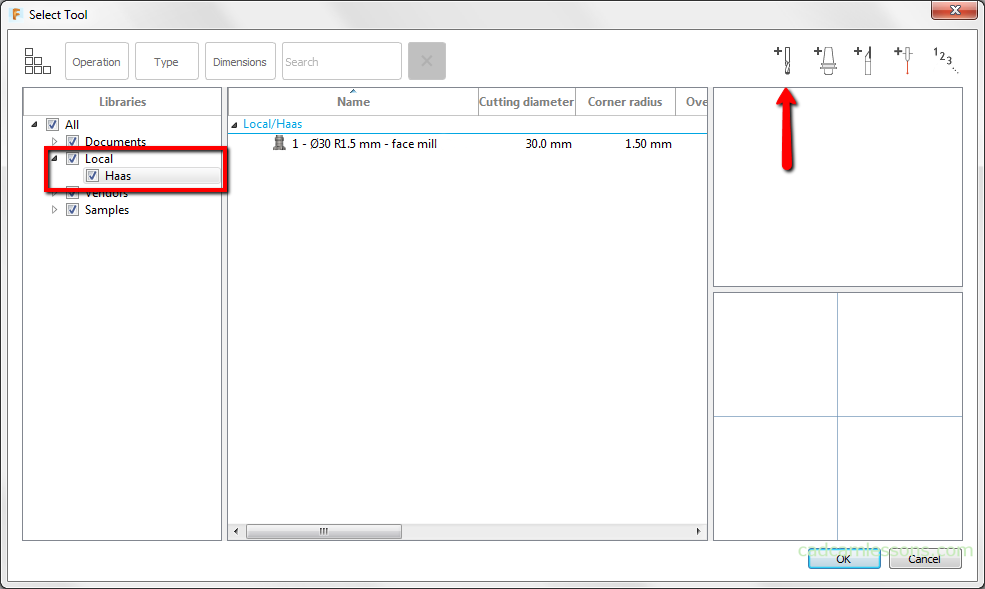
From this level, we can choose an existing tool or add new ones.
Let’s choose our local tool library. And click the New Mill Tool button in the upper right corner to add a new milling tool.
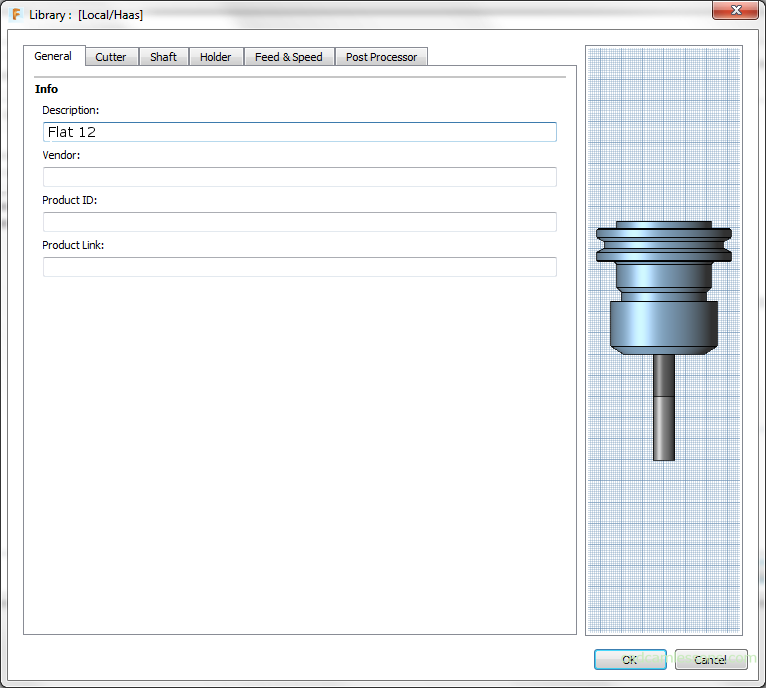
In the General tab, in the Description field, enter the file ‘Flat 12’.
Let’s go to the Cutter tab.
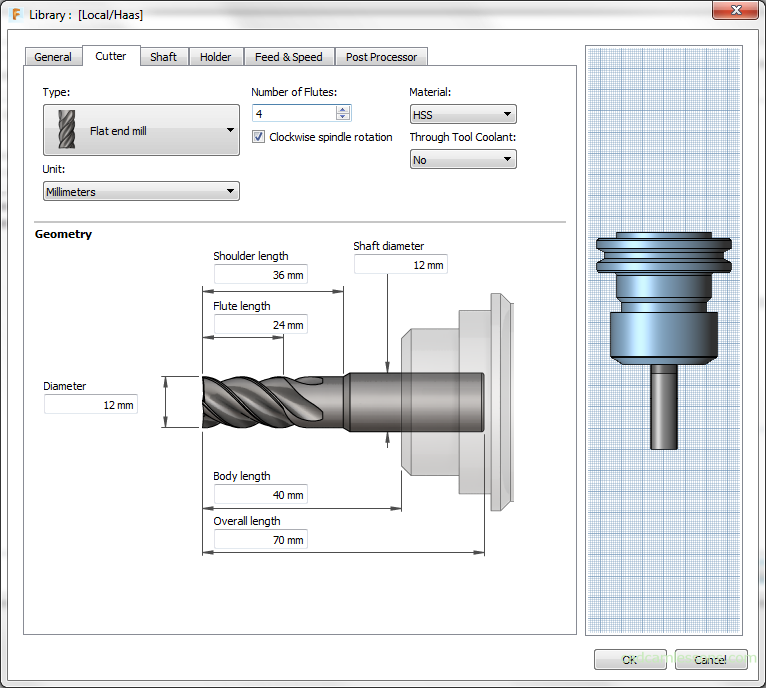
Fill the Cutter tab as shown in the figure above. We leave the Shaft and Holder tab with default values. Unless there is no holder selected, at this point we can choose any of the default holder.
Let’s go to the Feed & Speed tab.
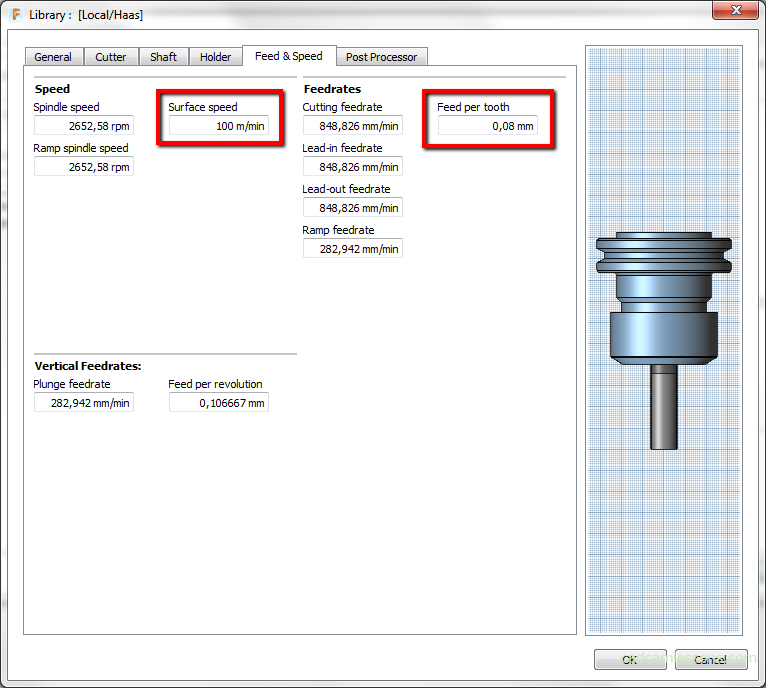
In this tab, we only change the cutting speed value – Surface Speed = 100 m/min and feed per tooth – Feed per tooth = 0.08 mm.
Other values will be converted.
Let’s go to the Post Processor tab.
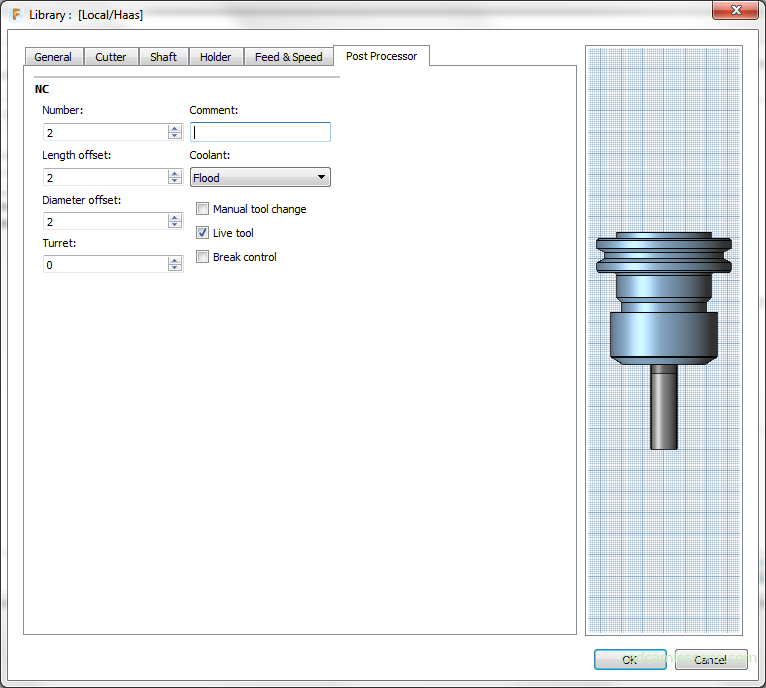
Here you can specify the number of the tool – Number = 2 and possibly the number of the compensation length – Length offset = 2 and the compensation of the diameter – Diameter offset = 2.
Click OK to add the tool to the library.
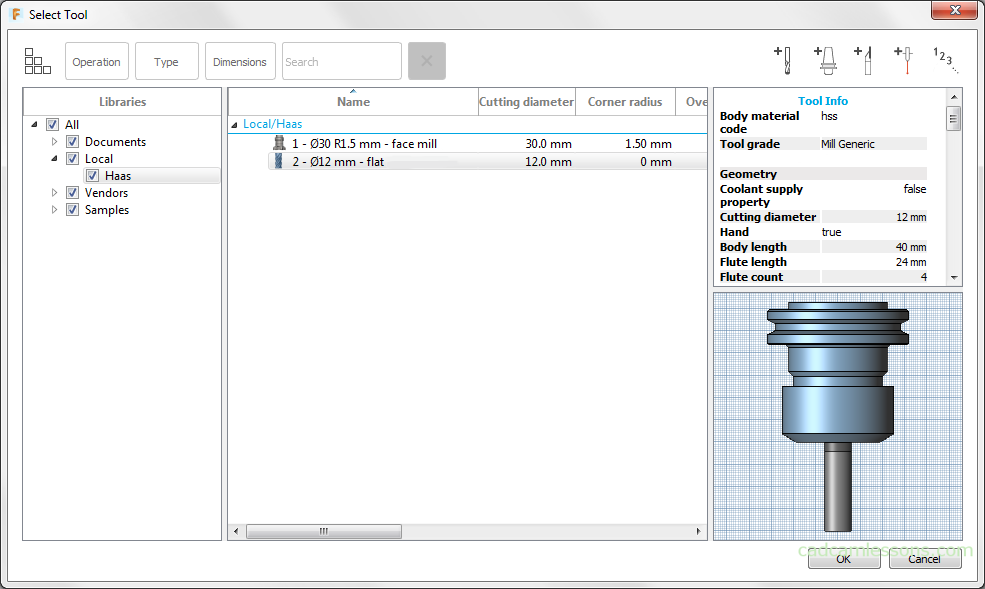
Select the newly added tool from the list and click OK to select the pocket processing tool.
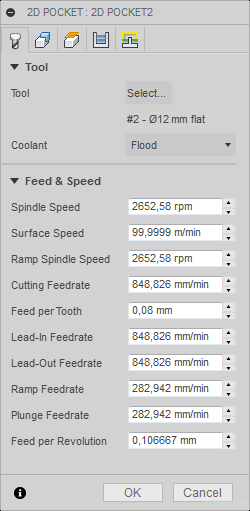
In the Coolant field, we can leave flood cooling – Flood.
The machining parameters have been updated to those defined during the tool definition.
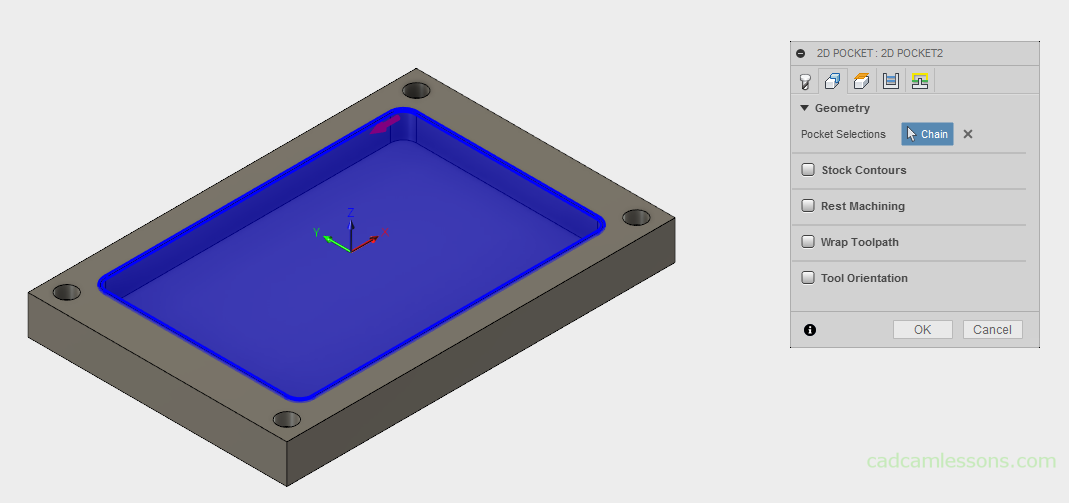
Let’s go to the Geometry tab and indicate the contour of the pocket as the geometry to be machined.
Now let’s go to the Heights tab.
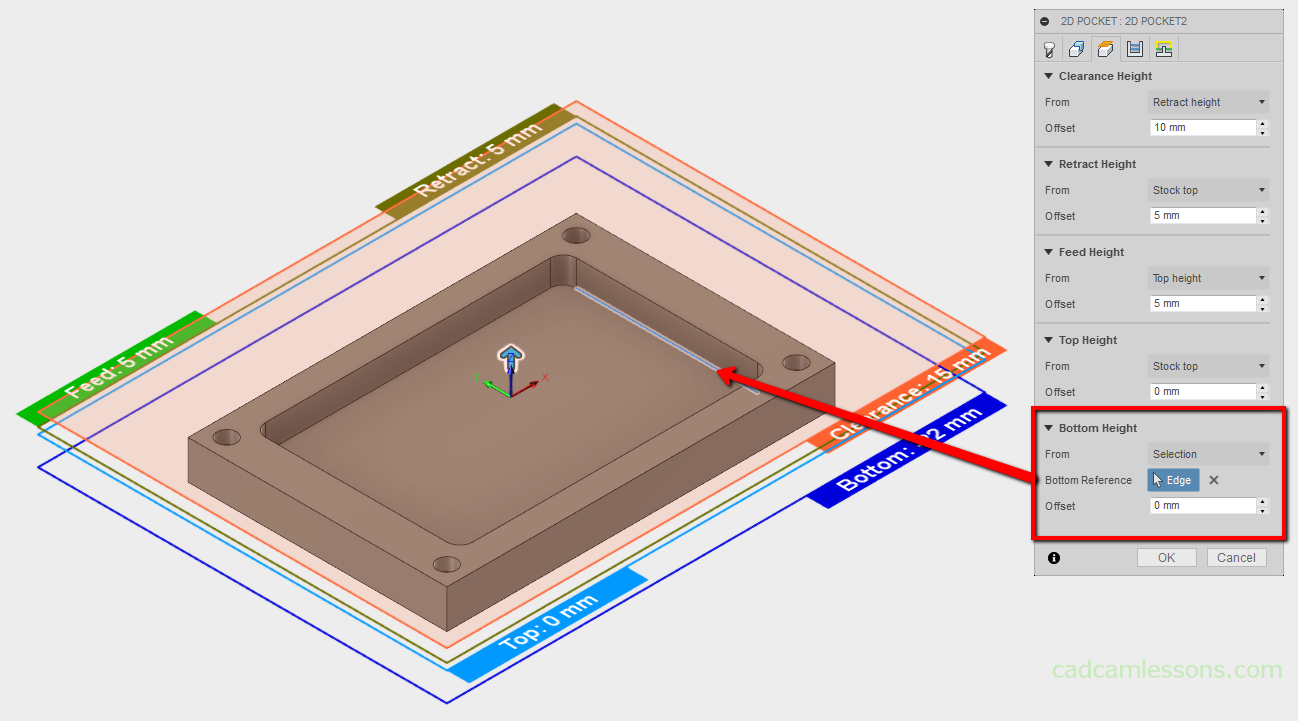
In the Bottom Height section, set the value of the From field to Selection and indicate the edge specifying the pocket depth. We can also indicate the wall at the bottom of the pocket.
We can click OK to save the machining with the default values, and in the next post we will check the next pocket machining options.