Drilling Cycle Data in Alphacam
YouTube: https://youtu.be/o68D9ndWC1U
In the previous lesson, we turned on the visibility of the tool path rapid movements.
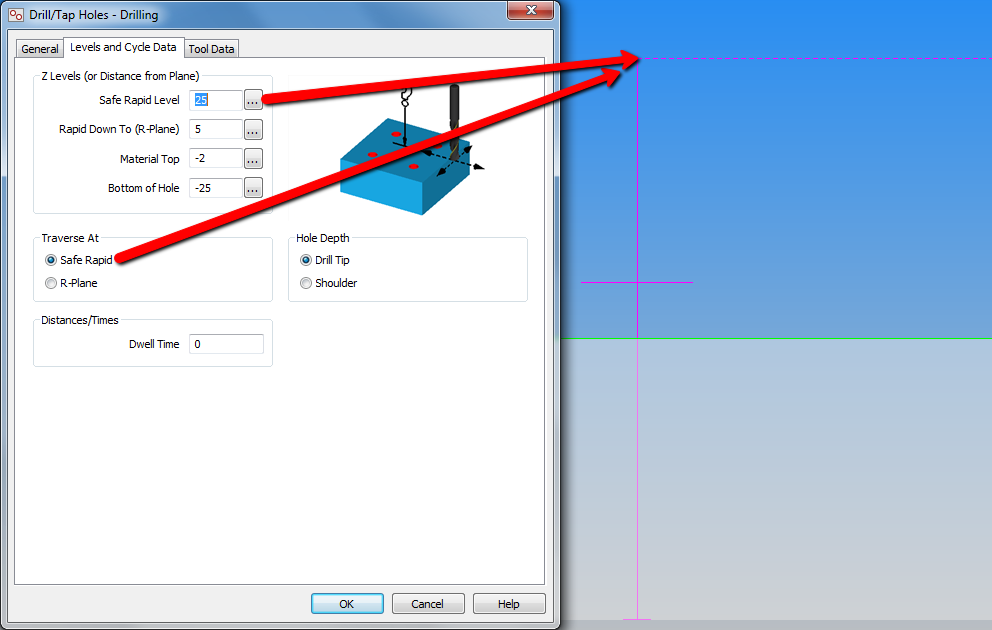
In the Levels and Cycle Data tab, two options are available in the Traverse At section: Safe Rapid and R-Plane.
When you choose the Safe Rapid option, rapid movements between the holes will be at the Safe Rapid Level.
When you choose the R-Plane option, rapid movements between the holes will be at the Rapid Down To (R-Plane) level.
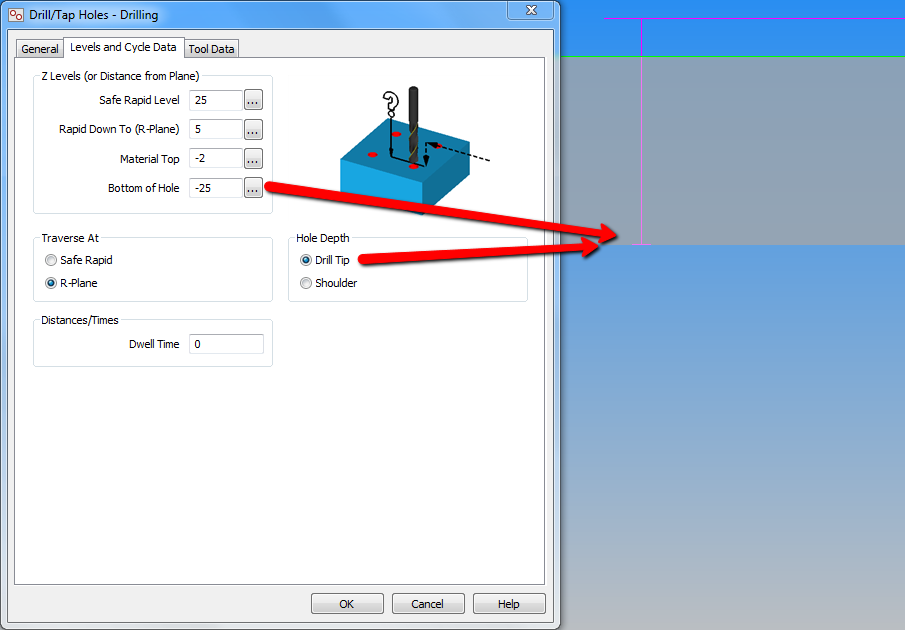
The next section I would like to discuss is the Hole Depth section. There are two options in this section: Drill Tip and Shoulder.
If you choose the Drill Tip option, drilling will continue until the drill tip has reached the Bottom of Holes level.
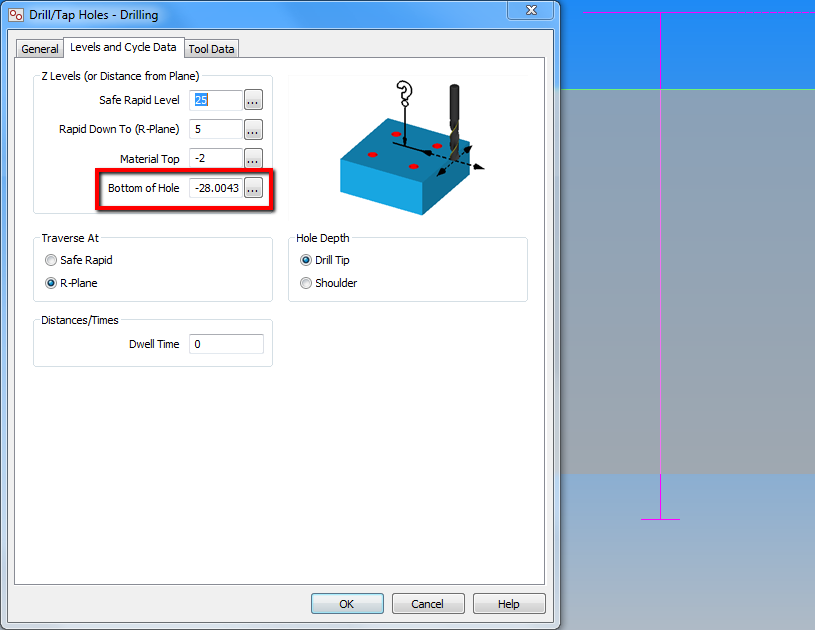
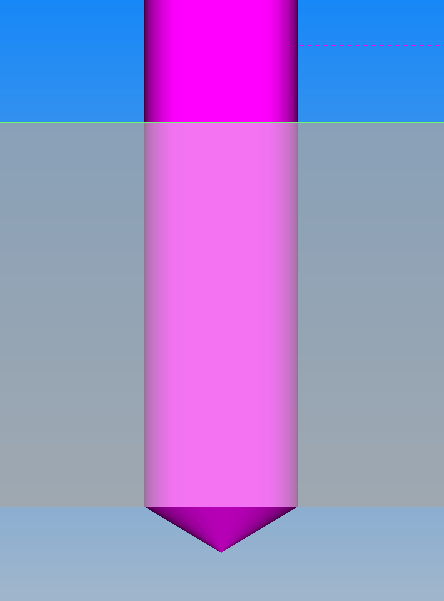
If you choose the Shoulder option, drilling will continue until the drill shoulder (the beginning of the cylindrical part of the tool) has reached the Bottom of Holes level.
When you enter the operation editing mode after selecting the Shoulder option you will see that the value of the Bottom of Hole parameter has been recalculated and the drilling will look like in the picture below:
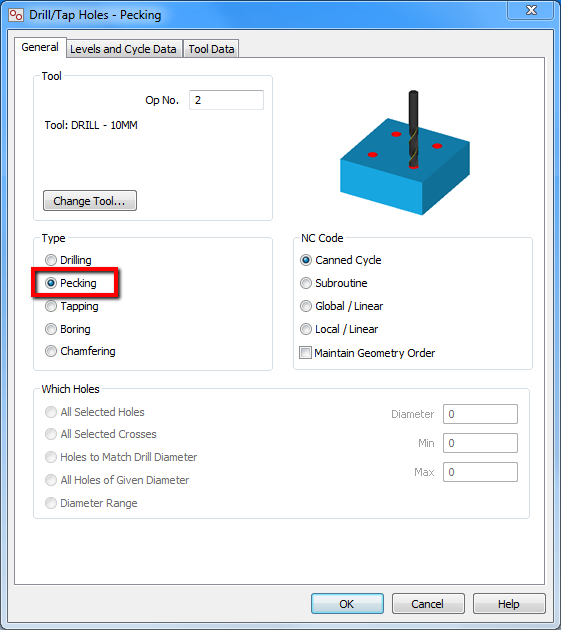
In the General tab, in the Types section there is another frequently used option: Pecking, deep drilling cycles (G83).
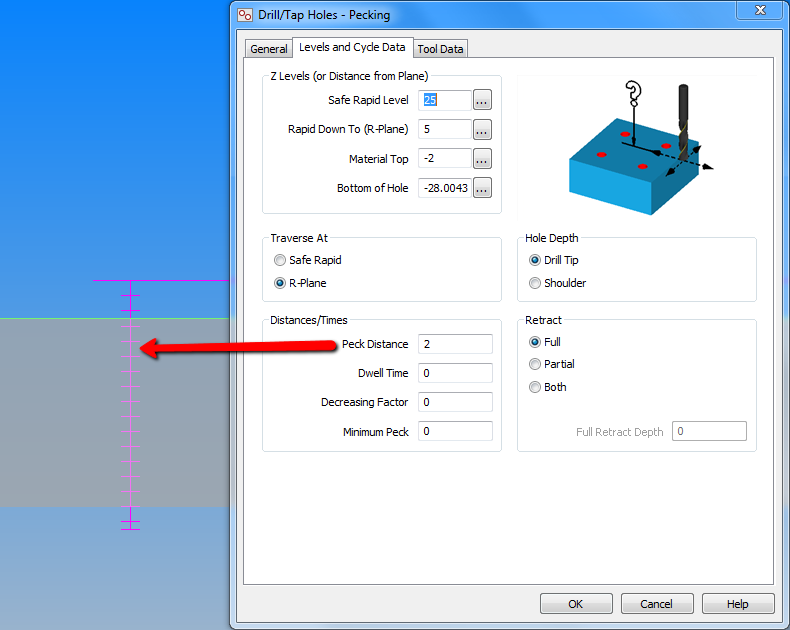
When you select the Pecking option, the Distances/Times section will appear in the Levels and Cycle Data tab.
At this point, the most important parameter from this section will be the Peck Distance parameter.
This is the distance between the individual depths in the deep drilling cycle.
If you find my tutorials helpful, you can support CADCAMLessons:
https://ko-fi.com/cadcamlessons

