If you find my tutorials helpful, you can support CADCAMLessons:
https://ko-fi.com/cadcamlessons
Linking Fusion 360
The last tab in the contour machining is the Linking tab.
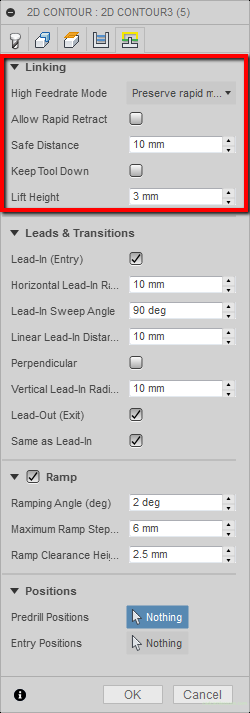
As we can see there are many more options here than in the case of Face operation.
The first two options in the Linking section are the same as for planning operation and have already been discussed previously.
The Safe Distance parameter is responsible for the value of safe height from which the tool will start working with the specified feedrate. It is also the height at which the tool will move between the machining areas.
Let’s set the Safe Distance = 5 mm.

The tool path will look like this:

Let’s now set the Safe Distance = 40 mm.

Now the tool path will look like in the figure below.

You can see the difference in level from which the tool will start working with the work feed and level on which it will move to the next area.
Note, that the Safe Distance value takes into account the allowance left in the Stock to Leave section. If the value Safe Distance = 40 and Axial Stock to Leave = 5, the tool will start working, with a federate, 45 mm above the material. At this height there will also be moving between machining areas. Keep in mind that this also works the other way, as the allowance will be negative.
If you set Safe Distance = 40 and Axial Stock to Leave = -5, movement between areas and the start of work with the work feedrate will be at 35 mm above the material.
After selecting the Keep Tool Down option, the Maximum Stay-Down Distance parameter is activated.
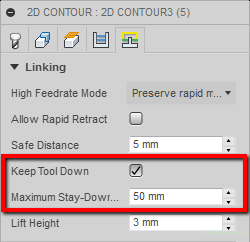
The Keep Tool Down parameter is responsible for keeping the tool down so that when moving to the next area to be machined, the tool does not retract to a safe height. The tool will not retract if the distance between next areas is less than that specified in the Maximum Stay-Down Distance parameter.
If we keep the tool in the bottom, then the move to the next area will take place at the depth level at which the machining is performed in the current operation, i.e. the tool will move at the bottom of the pocket (of course where there is no material), but it can generate unnecessary heating of the tool and material. It is worth lifting the tool gently. The Lift Height option is responsible for this.
In the case of simple 2D Contour processing, the one we have in the example is difficult to show the use of this option, but it should looks like this.
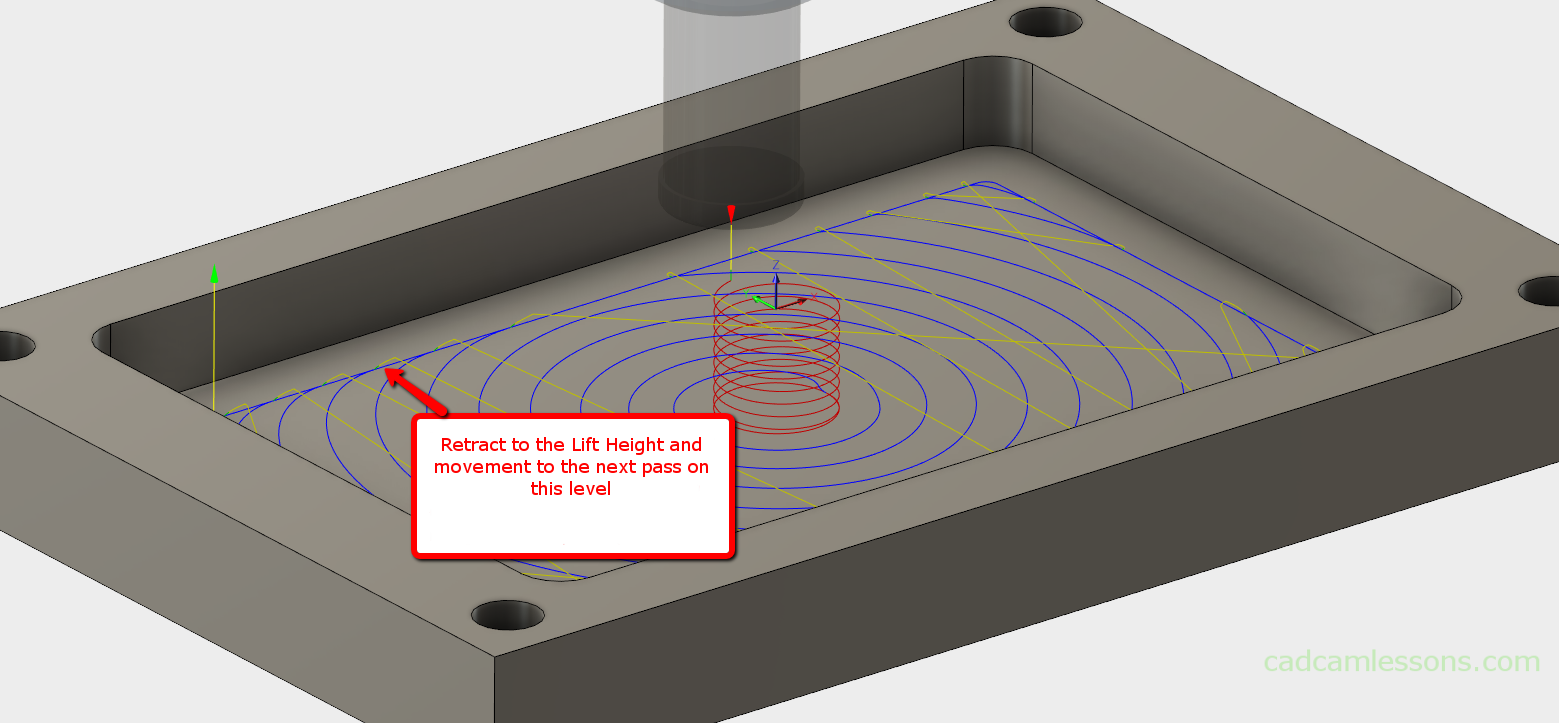
This is a 2D Adaptative Clearing operation. Before moving to the next pass, the tool is not retracted to a safe height, only to the level of the Lift Height, to limit heat generation when the material is touched gently, if the movement took place in the bottom of the pocket.