
Pocketing Alphacam
YouTube: https://youtu.be/w4lzJK4Qa98
In this lesson we will prepare internal pocket machining.
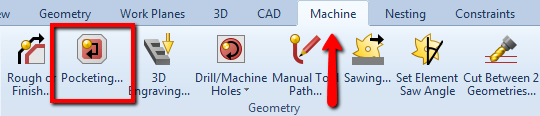
From the Machine tab select Pocketing command.
Types tab fill as shown below (default).

General tab fill as shown below.

Levels and Cuts tab fill as shown below.

Machining Data and Tool Data tabs leave with default values.
Click OK.
Now we have to select the geometry to be machined.
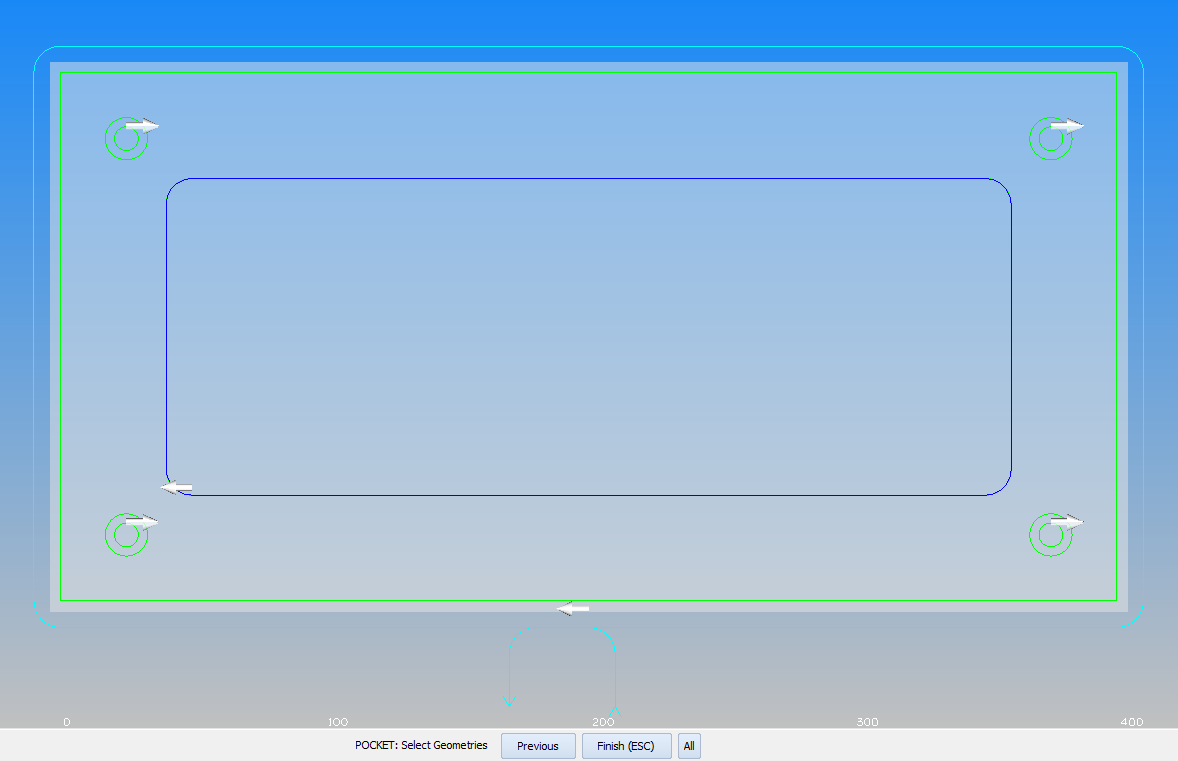
Select internal rectangle with fillets.
Accept by clicking Finish (ESC) button or RMB.
We should get something like in the picture below.

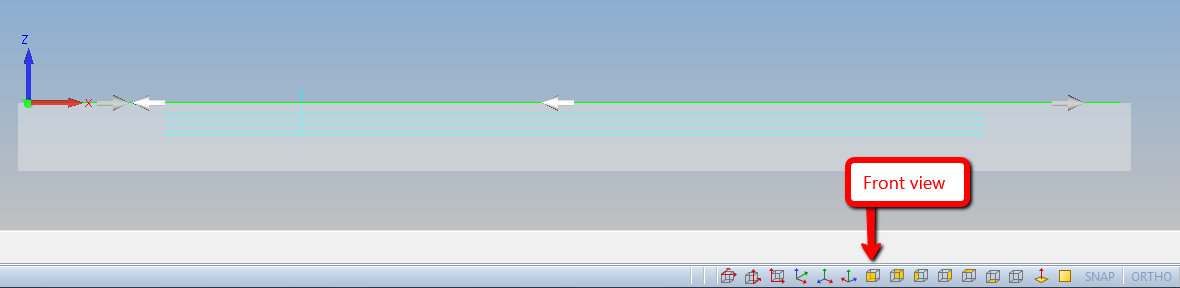
Select the Front view.
As you can see, all passes are equal. Let’s change it so that the first and last pass will be with the specified value.
Edit the last pocketing operation and select Levels and Cuts tab.
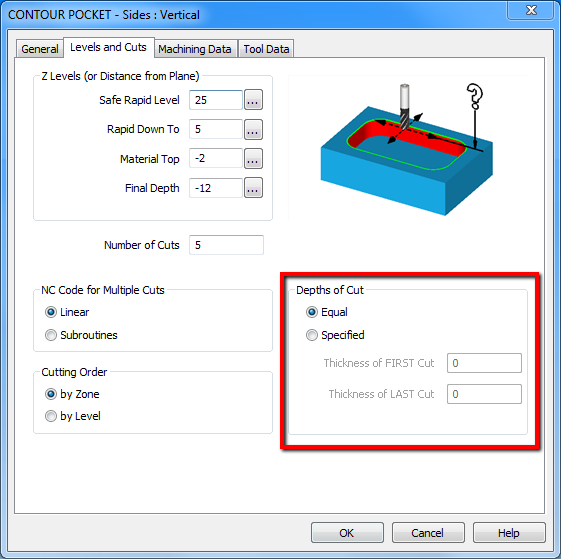
There is a Depths of Cut section here. By default it is set that the depth of each pass is the same.
Change to Specified value.

Options have been activated that allow you to specify the depth of the first and last cut.
Click OK and let’s check the toolpath.
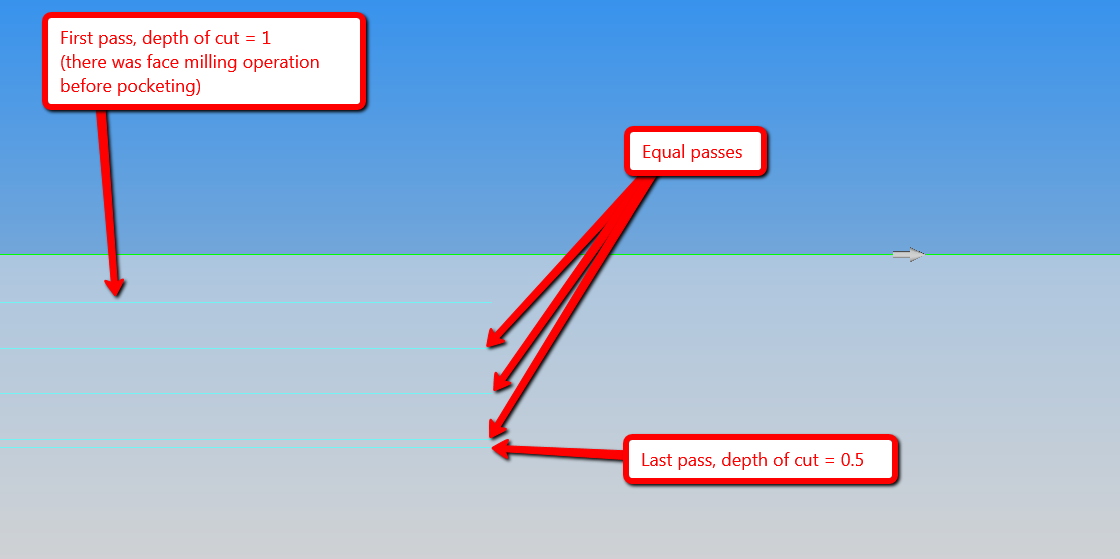
We have the first pass with depth of cut = 1; the last pass with depth of cut = 0.5 and three other passes with depth of cut = (10 – 1 – 0.5) / 3.
This option avoids too much depth of the first pass if the material was uneven and it allows us to use the smaller last pass to better finish the surface.
Subscribe me on YouTube!
Watch the video below!
If you find my tutorials helpful, you can support CADCAMLessons:
https://ko-fi.com/cadcamlessons