If you find my tutorials helpful, you can support CADCAMLessons:
https://ko-fi.com/cadcamlessons
Use Morphed Spiral Machining Fusion 360
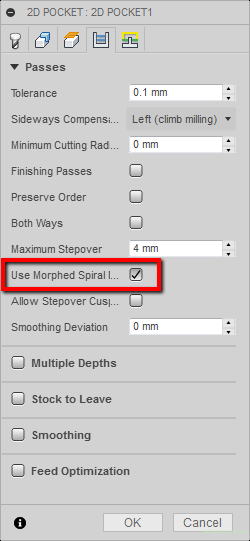
The Use Morphed Spiral Machining option cause the toolpath will be generated in the shape of a morphic spiral. Where the spiral tries to reproduce the shape of the boundary of the machined geometry. In this case, the shape of the pocket.
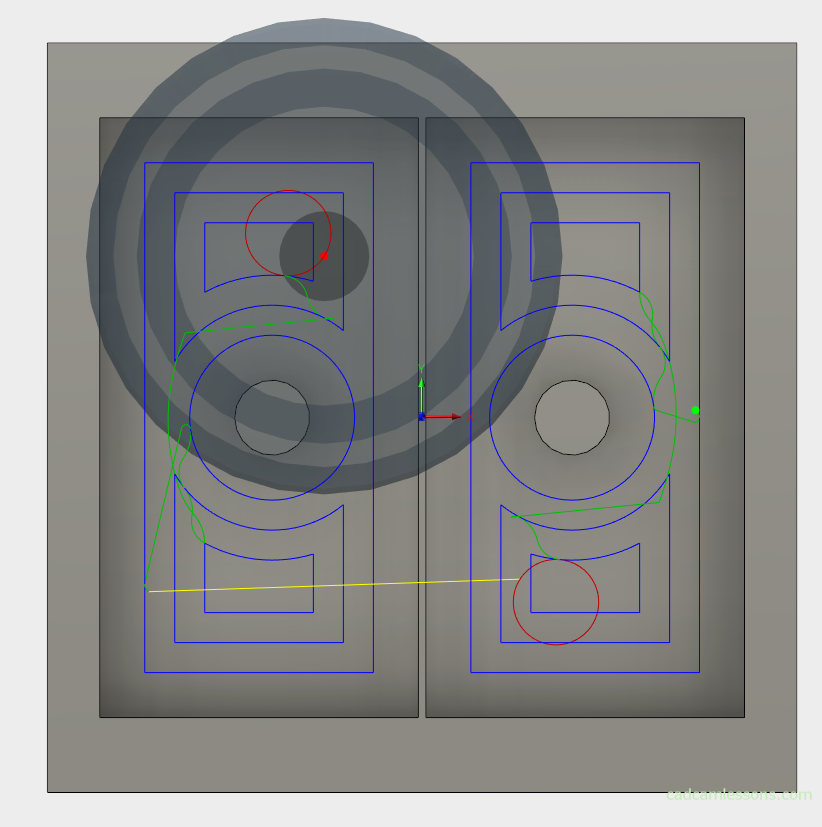
This is how the sample tool path looks like without using the Use Morphed Spiral Machining option.
And so with the use of this option.
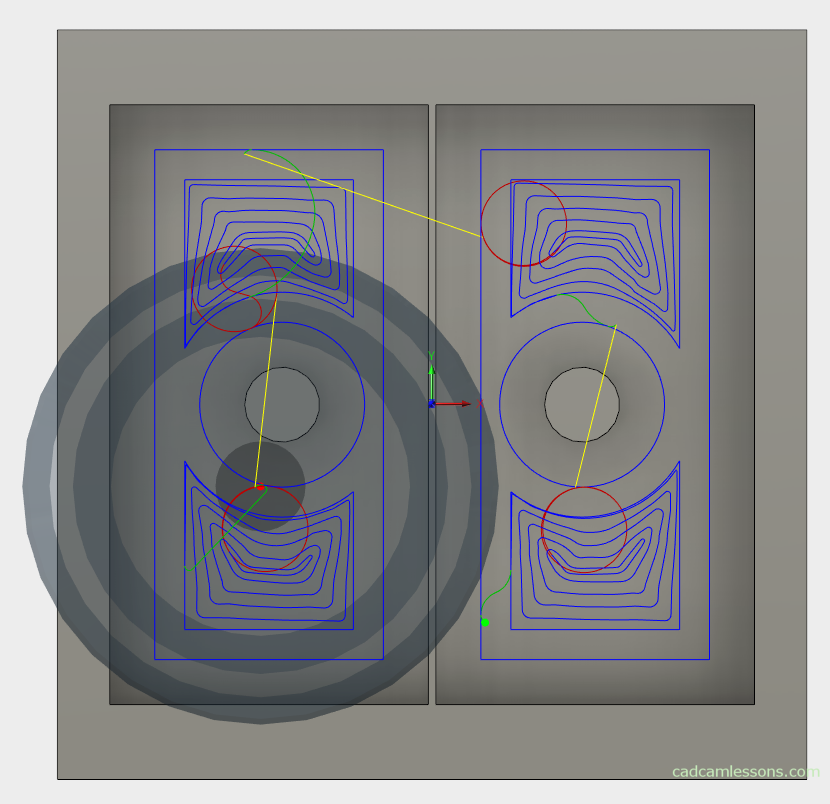
You can see a difference in the tool paths. But does this mean that the spiral path is better? It is possible that the tool will be less loaded, but this is mainly due to the fact that when machining using a morphic spiral, we have a smaller cutting width and in most of the tool paths we do not have sharp changes in the cutting direction. However, when comparing times, processing using the Use Morphed Spiral Machining option takes almost twice as long.
In my opinion, better results will give us just rounding the corners with the Minimum Cutting Radius and Smoothing Deviation options.
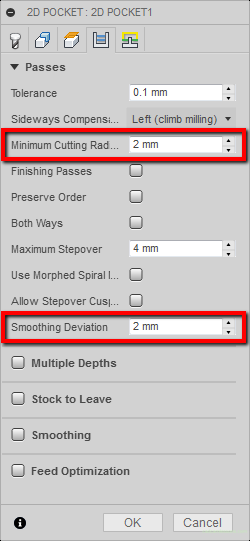
Then the tool path looks as follows.
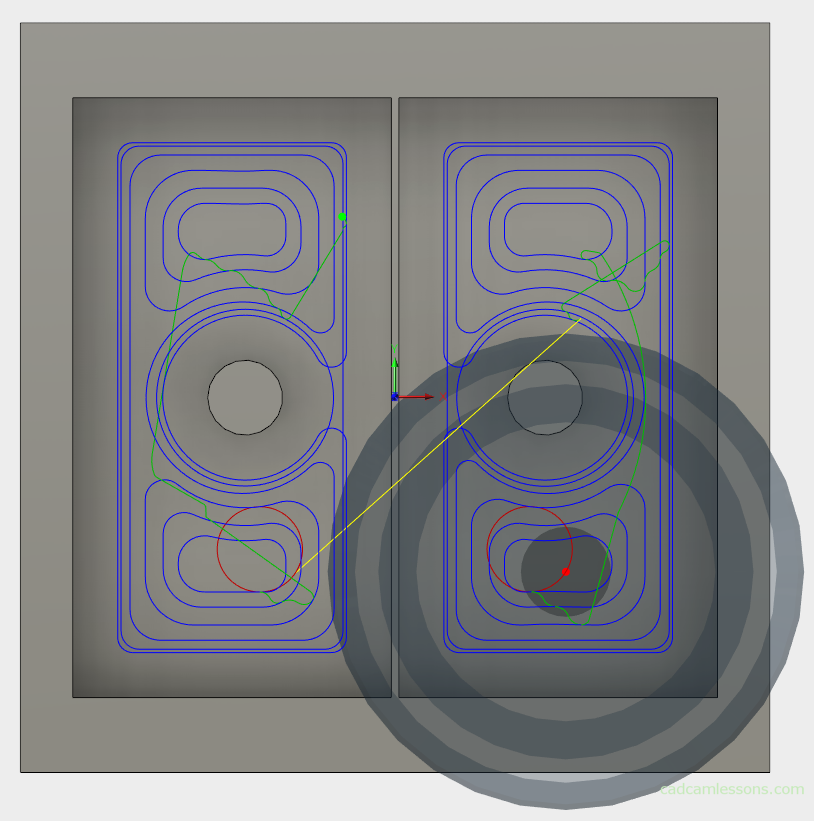
Of course, it is always best to check on the machine, which gives better results and what we care about most. Whether to increase the tool life or to shorten the machining time.
It is worth notice that the strategy with the use of a morphic spiral will give us a longer machining program, consisting mainly of short moves G1, G2 and G3.
There is one strategy for machining the pocket, which will give us interesting results and at this point I would not delve too much into the Use Morphed Spiral Machining option. A tool path of this type would be better used in the case of quick preparation of 3-axis finishing than in the case of typical flat pockets. But we will deal with 3-axis machining later.
Another option is Allow Stepover Cusp.
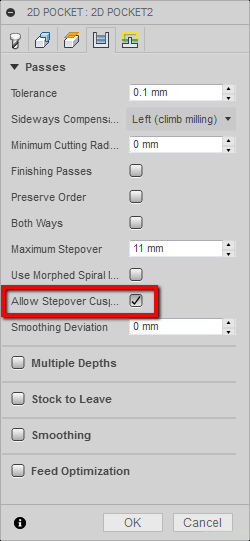
If you use the tool with a corner radius in the machining process, in case of too large a machining step – Maximum Stepover, the unfinished cusp may remain between subsequent passes.
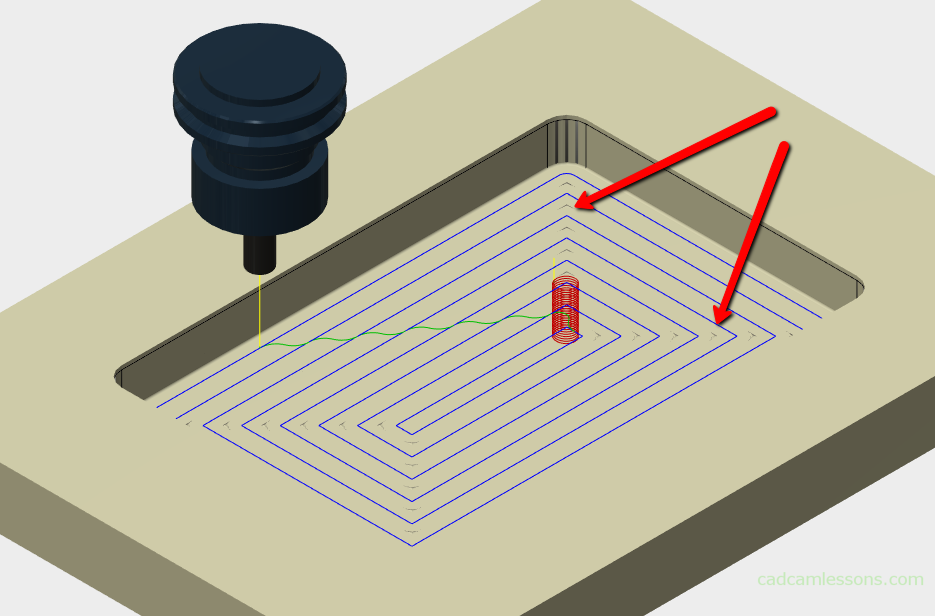
If we use, for example, a tool with a diameter of 12 mm with a corner radius of 1 mm, we will set the transition step to 11 mm and select the option Allow Stepover Cusp to leave the rough material unmachined. By default, this option is turned off, and Fusion 360 makes sure that such situations do not occur and even if we manually set a large step, then when the Allow Stepover Cusp option is turned off, the Maximum Stepover parameter will be adjusted so that it is not such unmachined places.

We can see that the tool paths have been a little dense and there are no more rough cusps between the passes.
